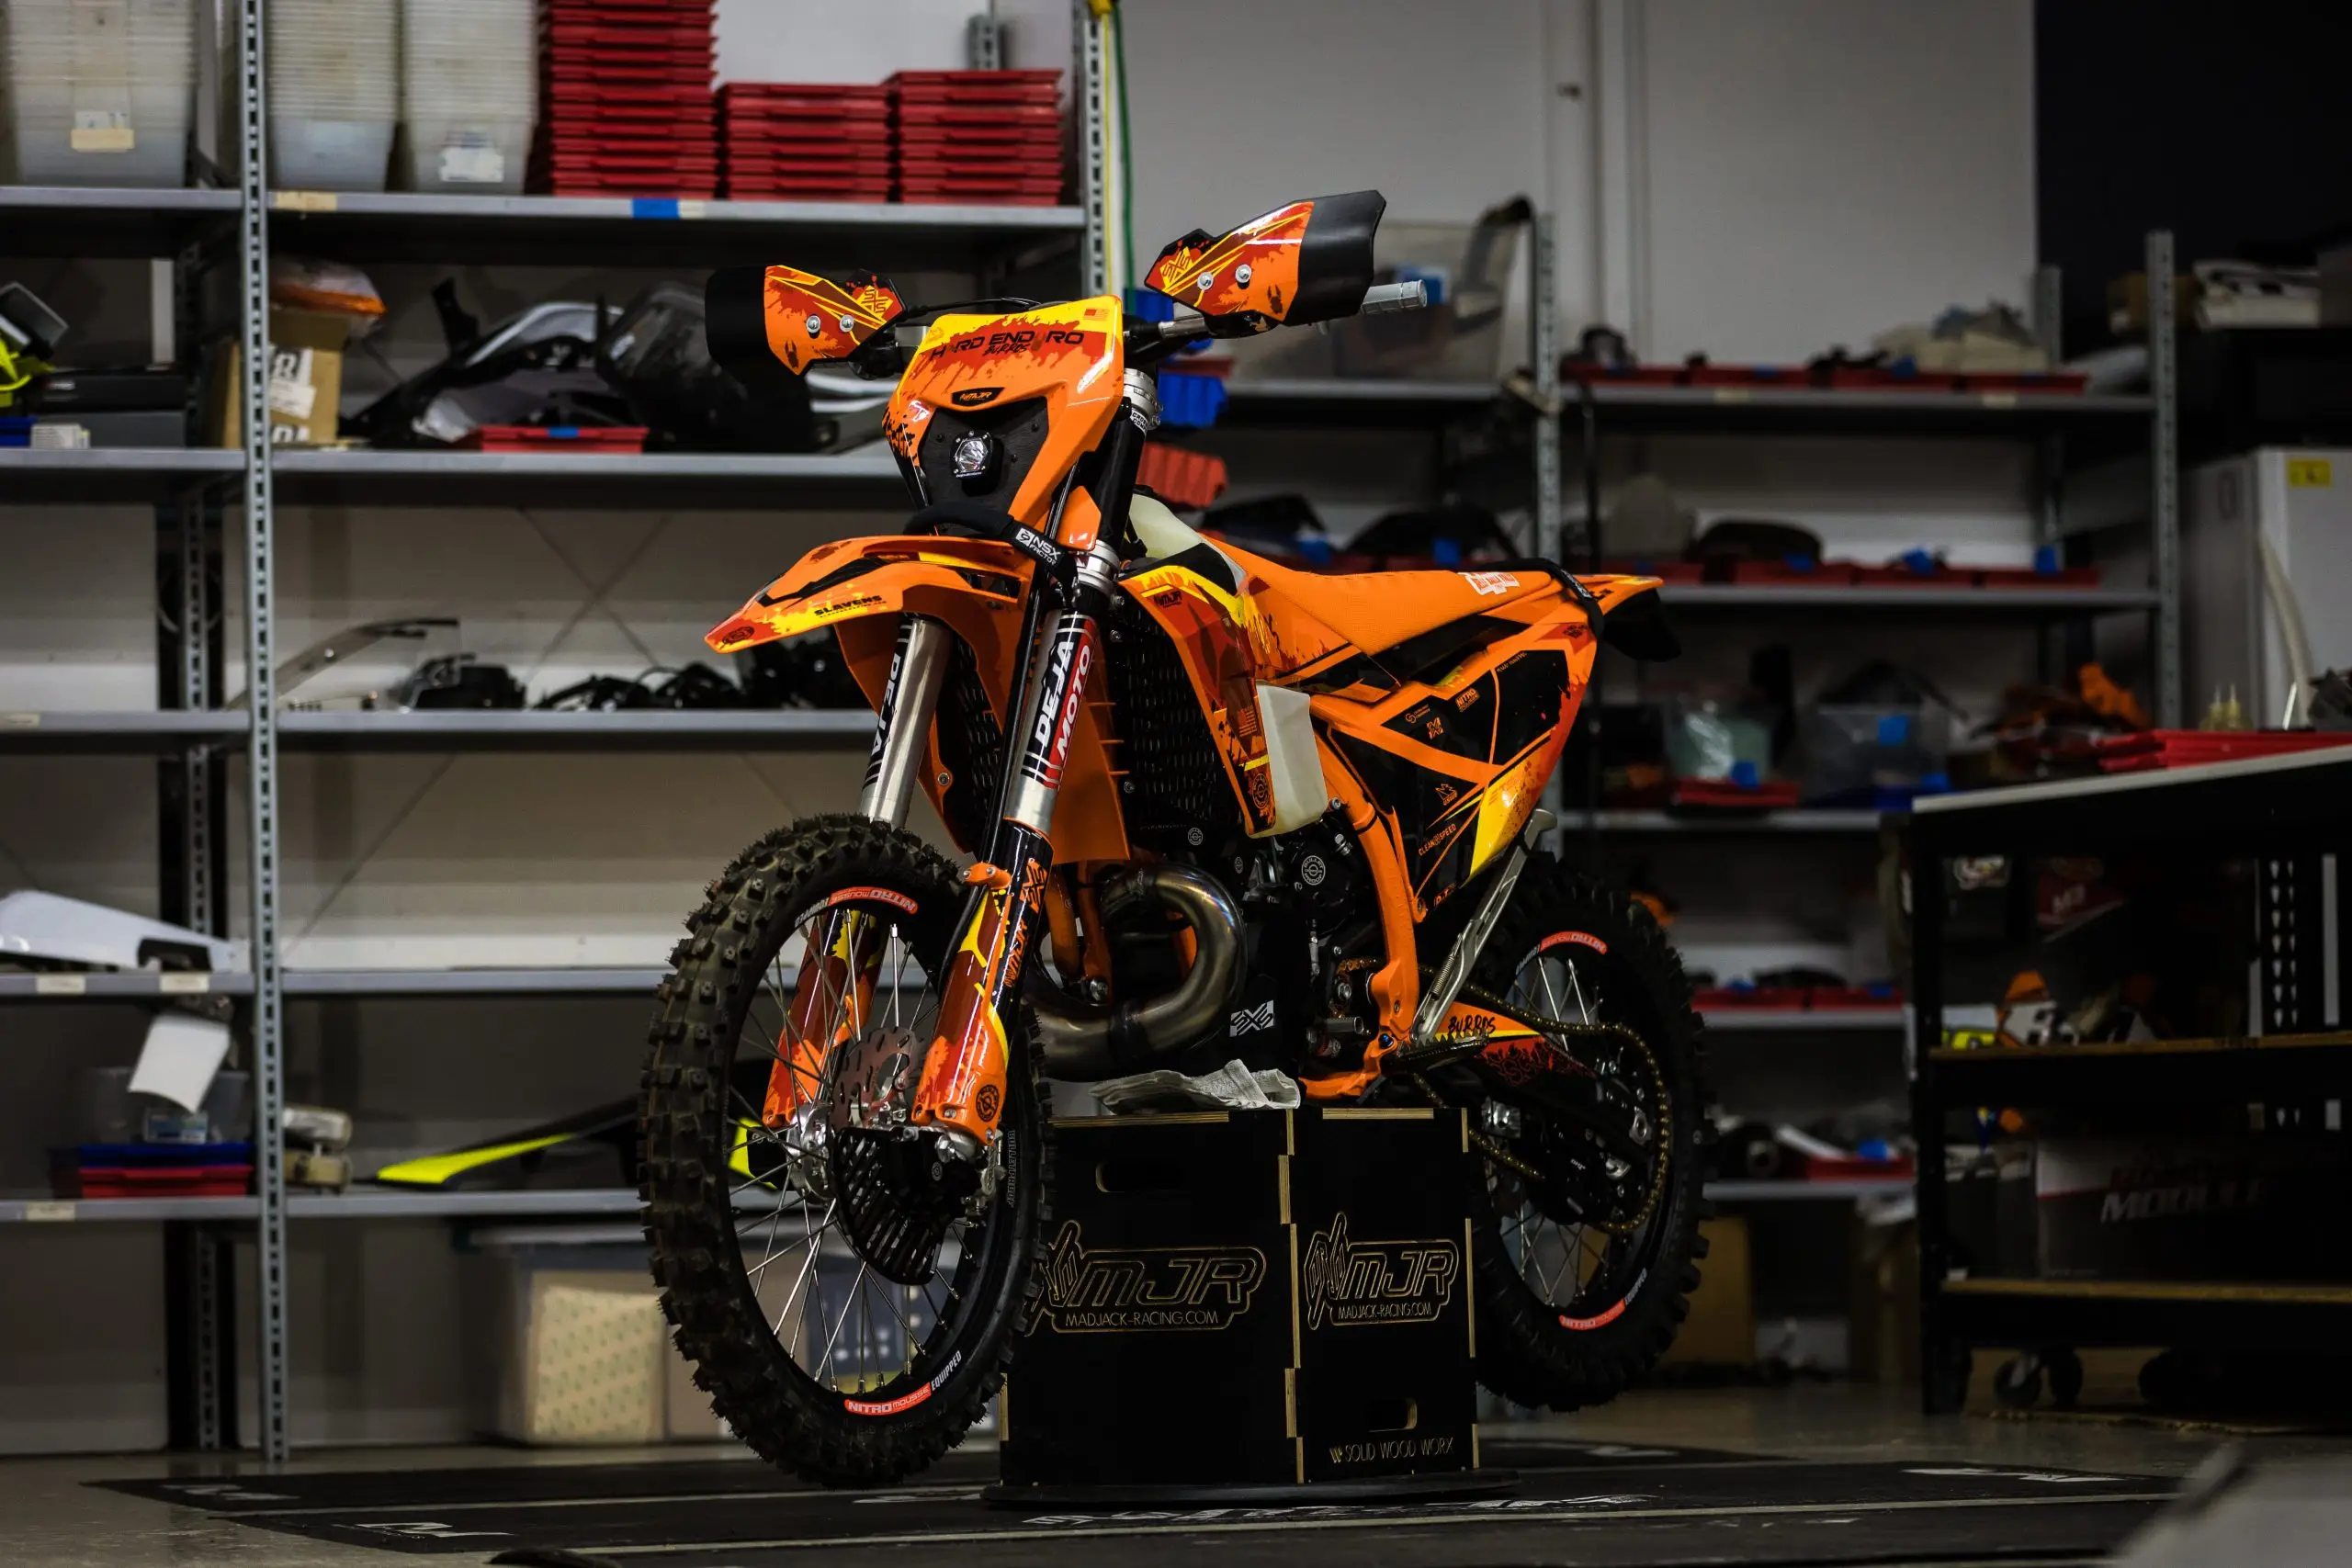
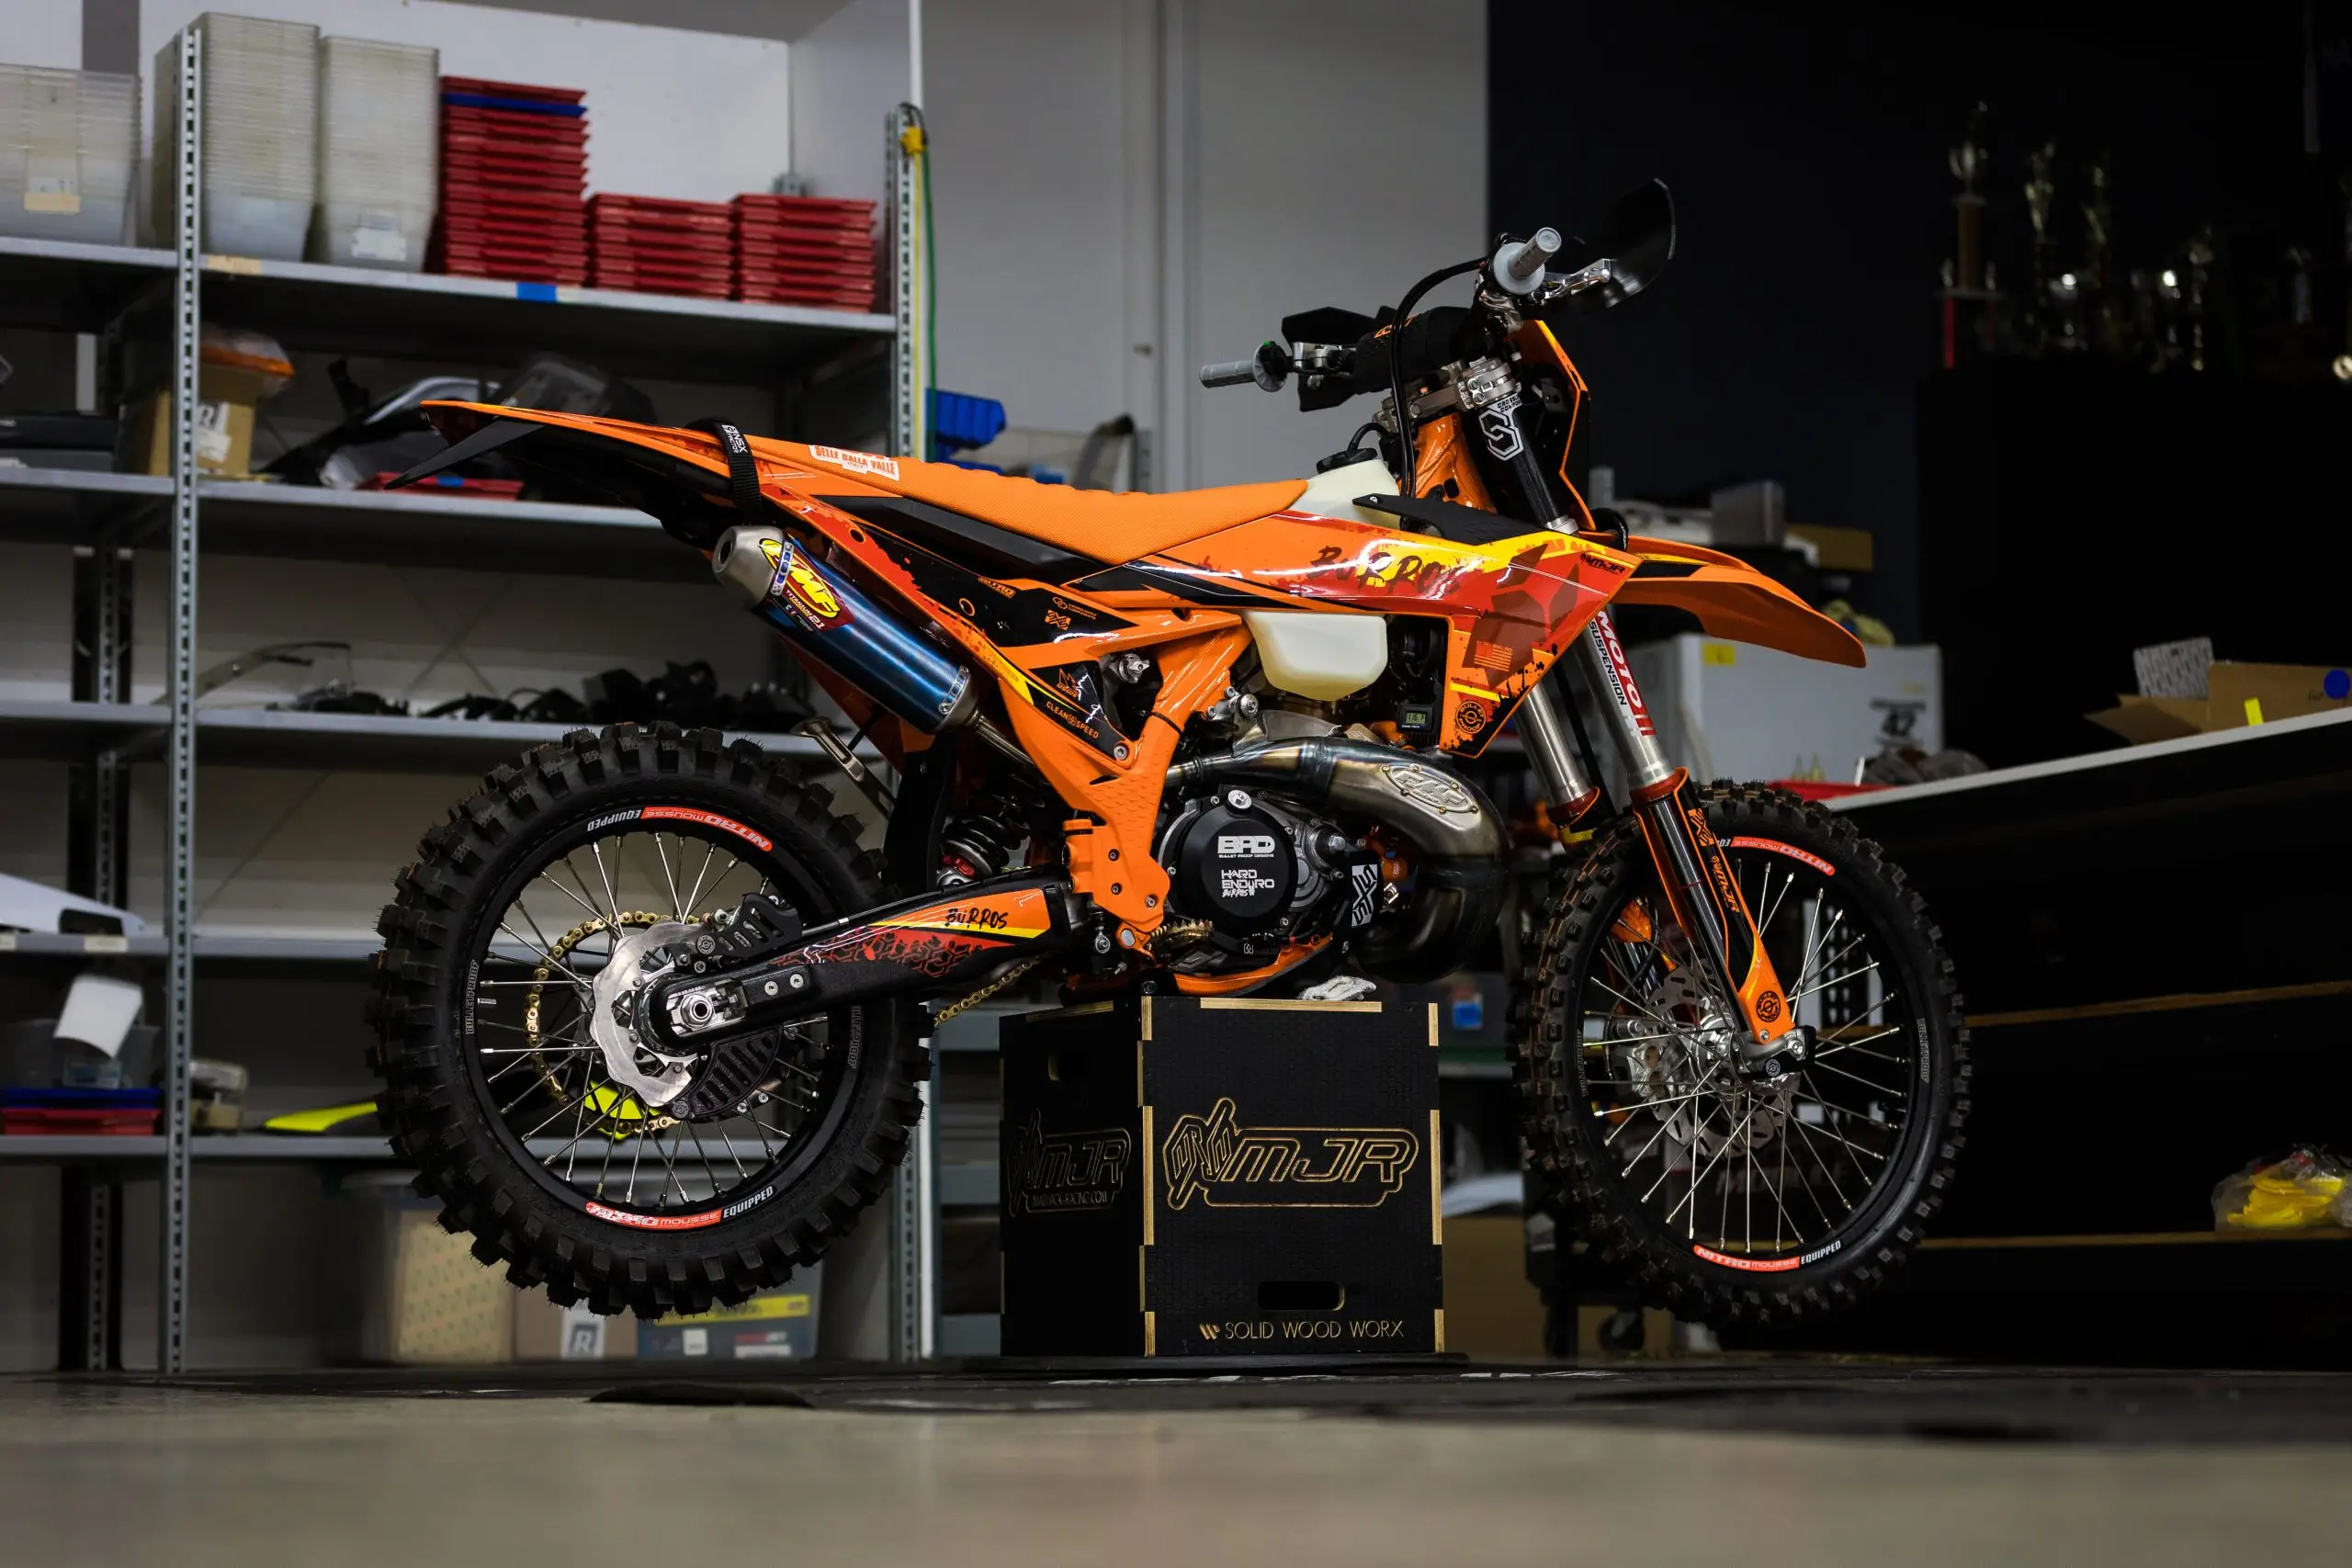
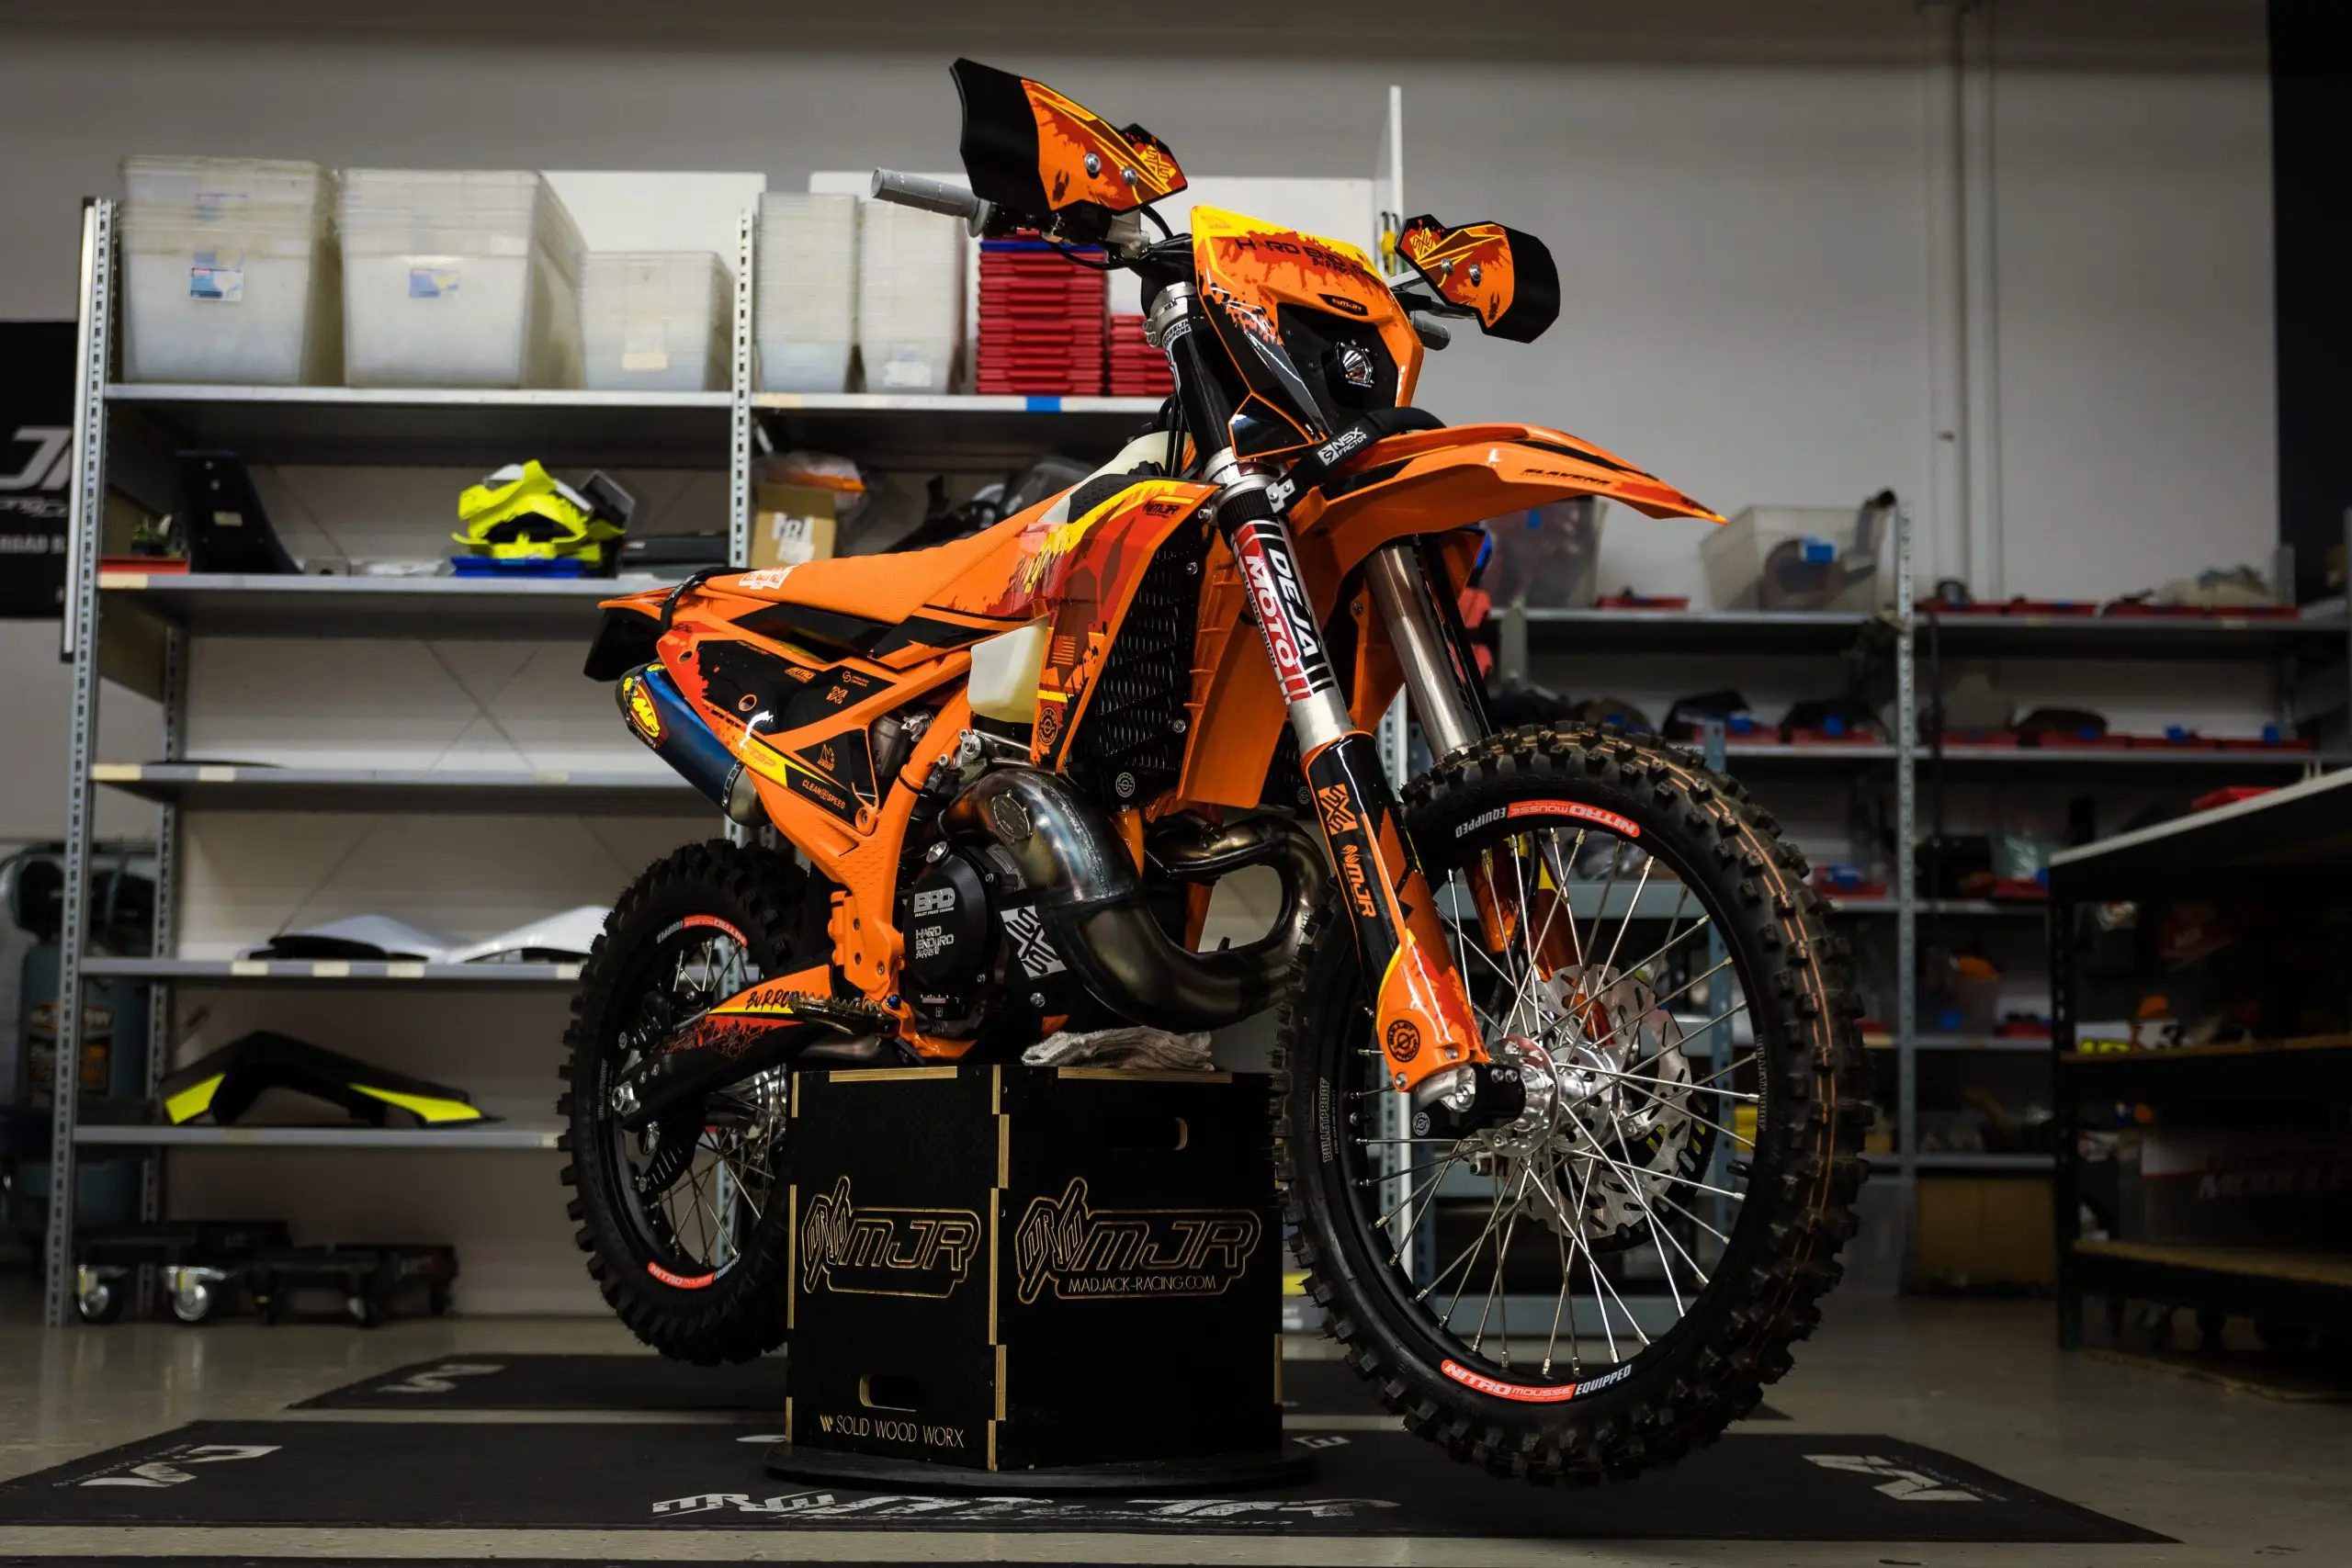
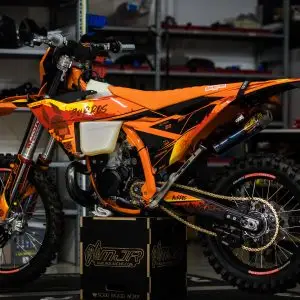
Building a dirt bike out for hard enduro is no small task given the intense use case, and demanding requirements of the bike to perform in tough situations and the sheer punishment it gets while out filming the Burros in gnarly terrain. To build out the perfect hard enduro media bike we worked with the legend, Jack Moore, at Madjack Racing to take the bone stock bike and build it out proper. We started with a 2025 KTM 300 XCW Champion Edition we sourced from our friends over at Hi-Tech Motorsports – an awesome KTM dealership in Billings, MT. It’s rare to find a dealership who “gets’ hard enduro.


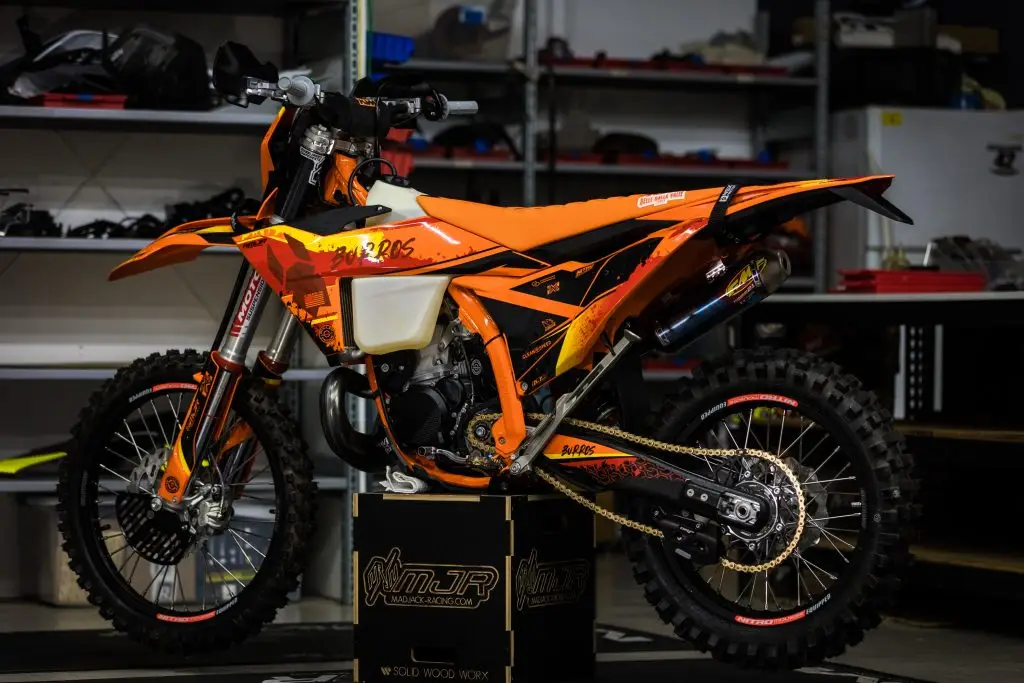
For this bike build we focused on increasing longevity on chassis parts, increase performance out of the motor and hard enduro suspension setup, and installing the right protection parts for its survivability during the inevitable hard enduro bike flipping. In this post we break down the key elements of this build, including all the brands that contributed products and the techniques used to make this bike Burros-ready.
Before any modifications take place, the new bike undergoes a complete chassis breakdown, lubrication of critical areas, and a thorough inspection to ensure a flawless start. It’s common to find the brand-new bikes arrive with a lack of proper greasing from the factory so it’s imperative to start with a solid greasing of all major components, before the installation of new parts.
-
- Disassemble the Bike – Remove the wheels, suspension components, steering stem and rear swingarm to expose the frame and bearings.
-
- Apply Grease – Use high-quality waterproof grease on the swingarm pivot, headset bearings, and linkage components to prevent premature wear. We also will grease the wheel bearings before the wheels get installed. We use the Maxima water proof all-purpose grease.
- Install Anti-Seize – A little trick Jack has found to be very helpful in the long run is to apply a little anti-seize to chain adjuster bolts to prevent corrosion and ensure easy adjustments in the future. On some Japanese bikes in particular the bolts can get galled up fairly easily and be extremely hard to remove after some hours are on the bike. It’s not as common on the Austrian bikes but still a good practice.
Protection & Durability: Reinforcing with Hard Parts
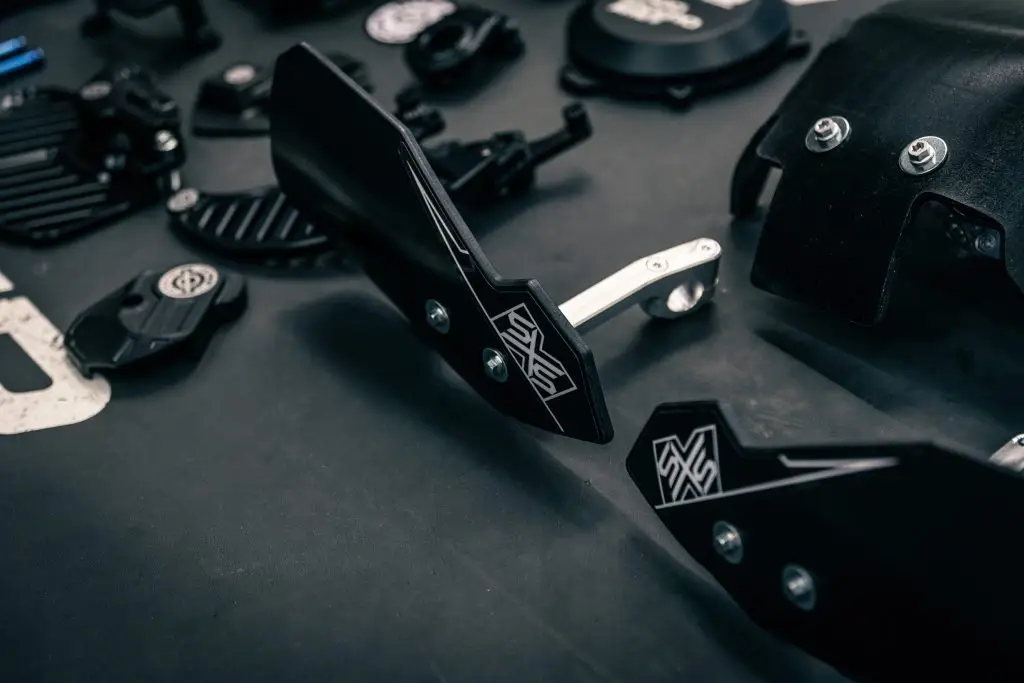
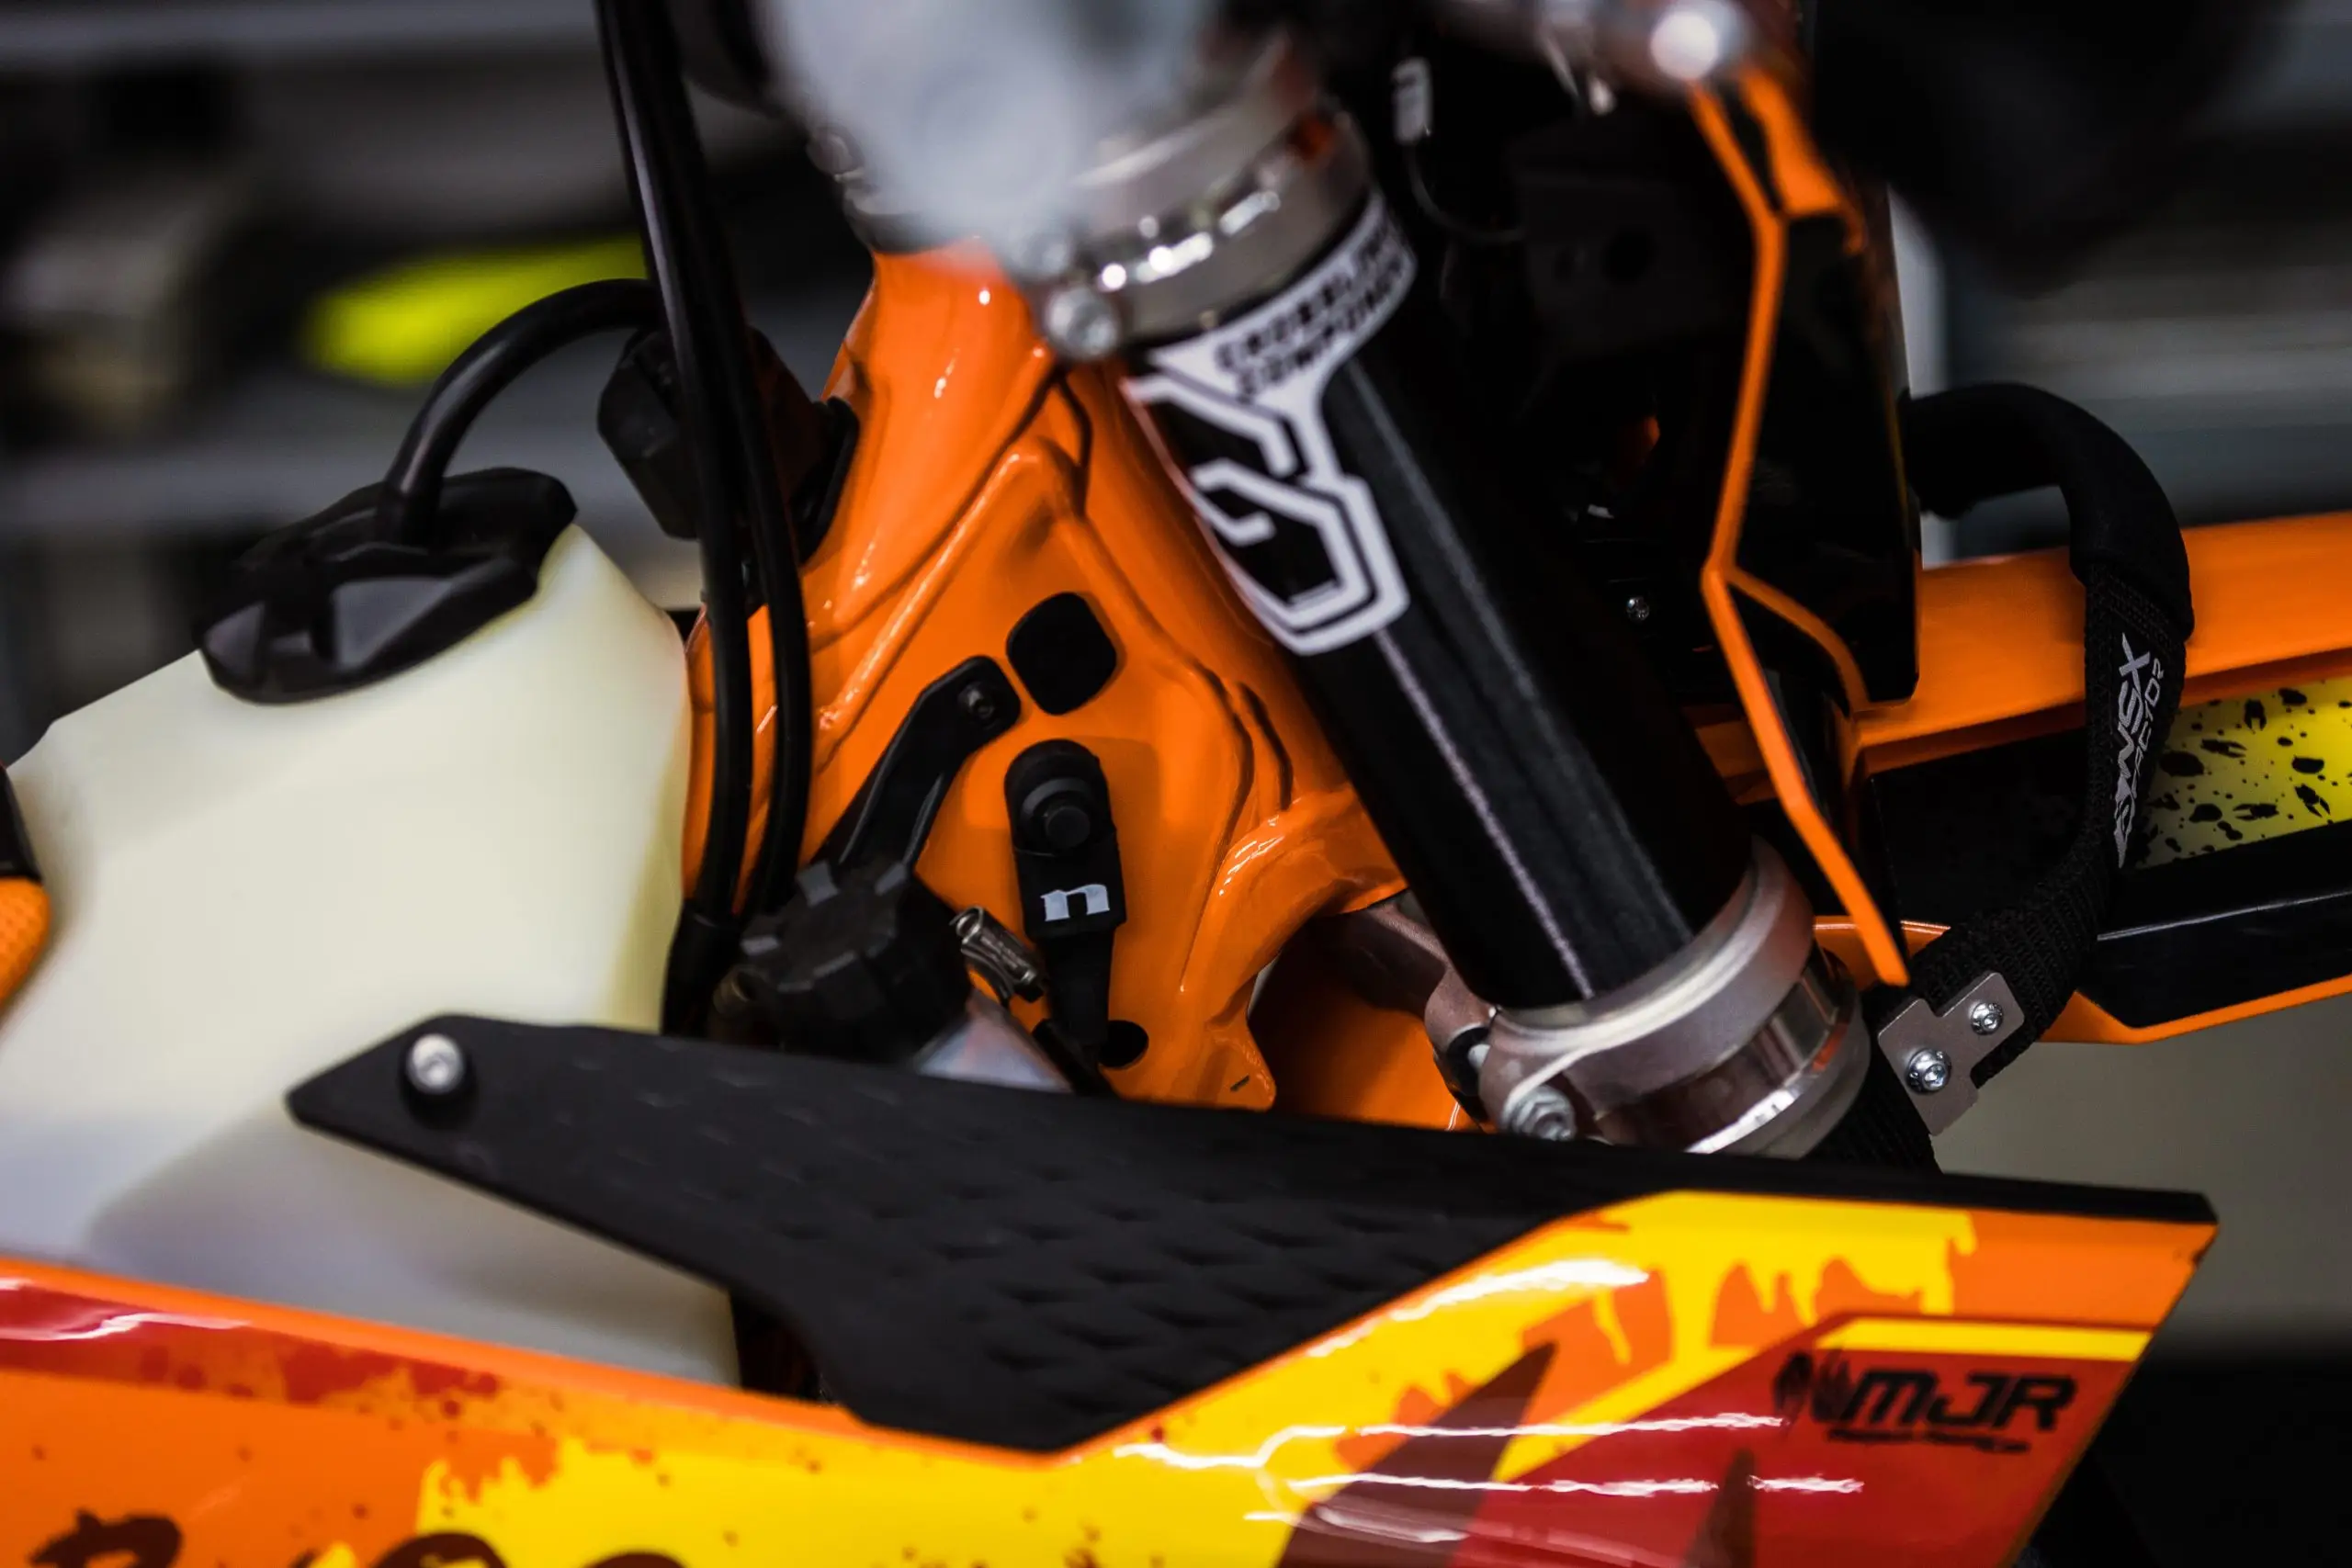
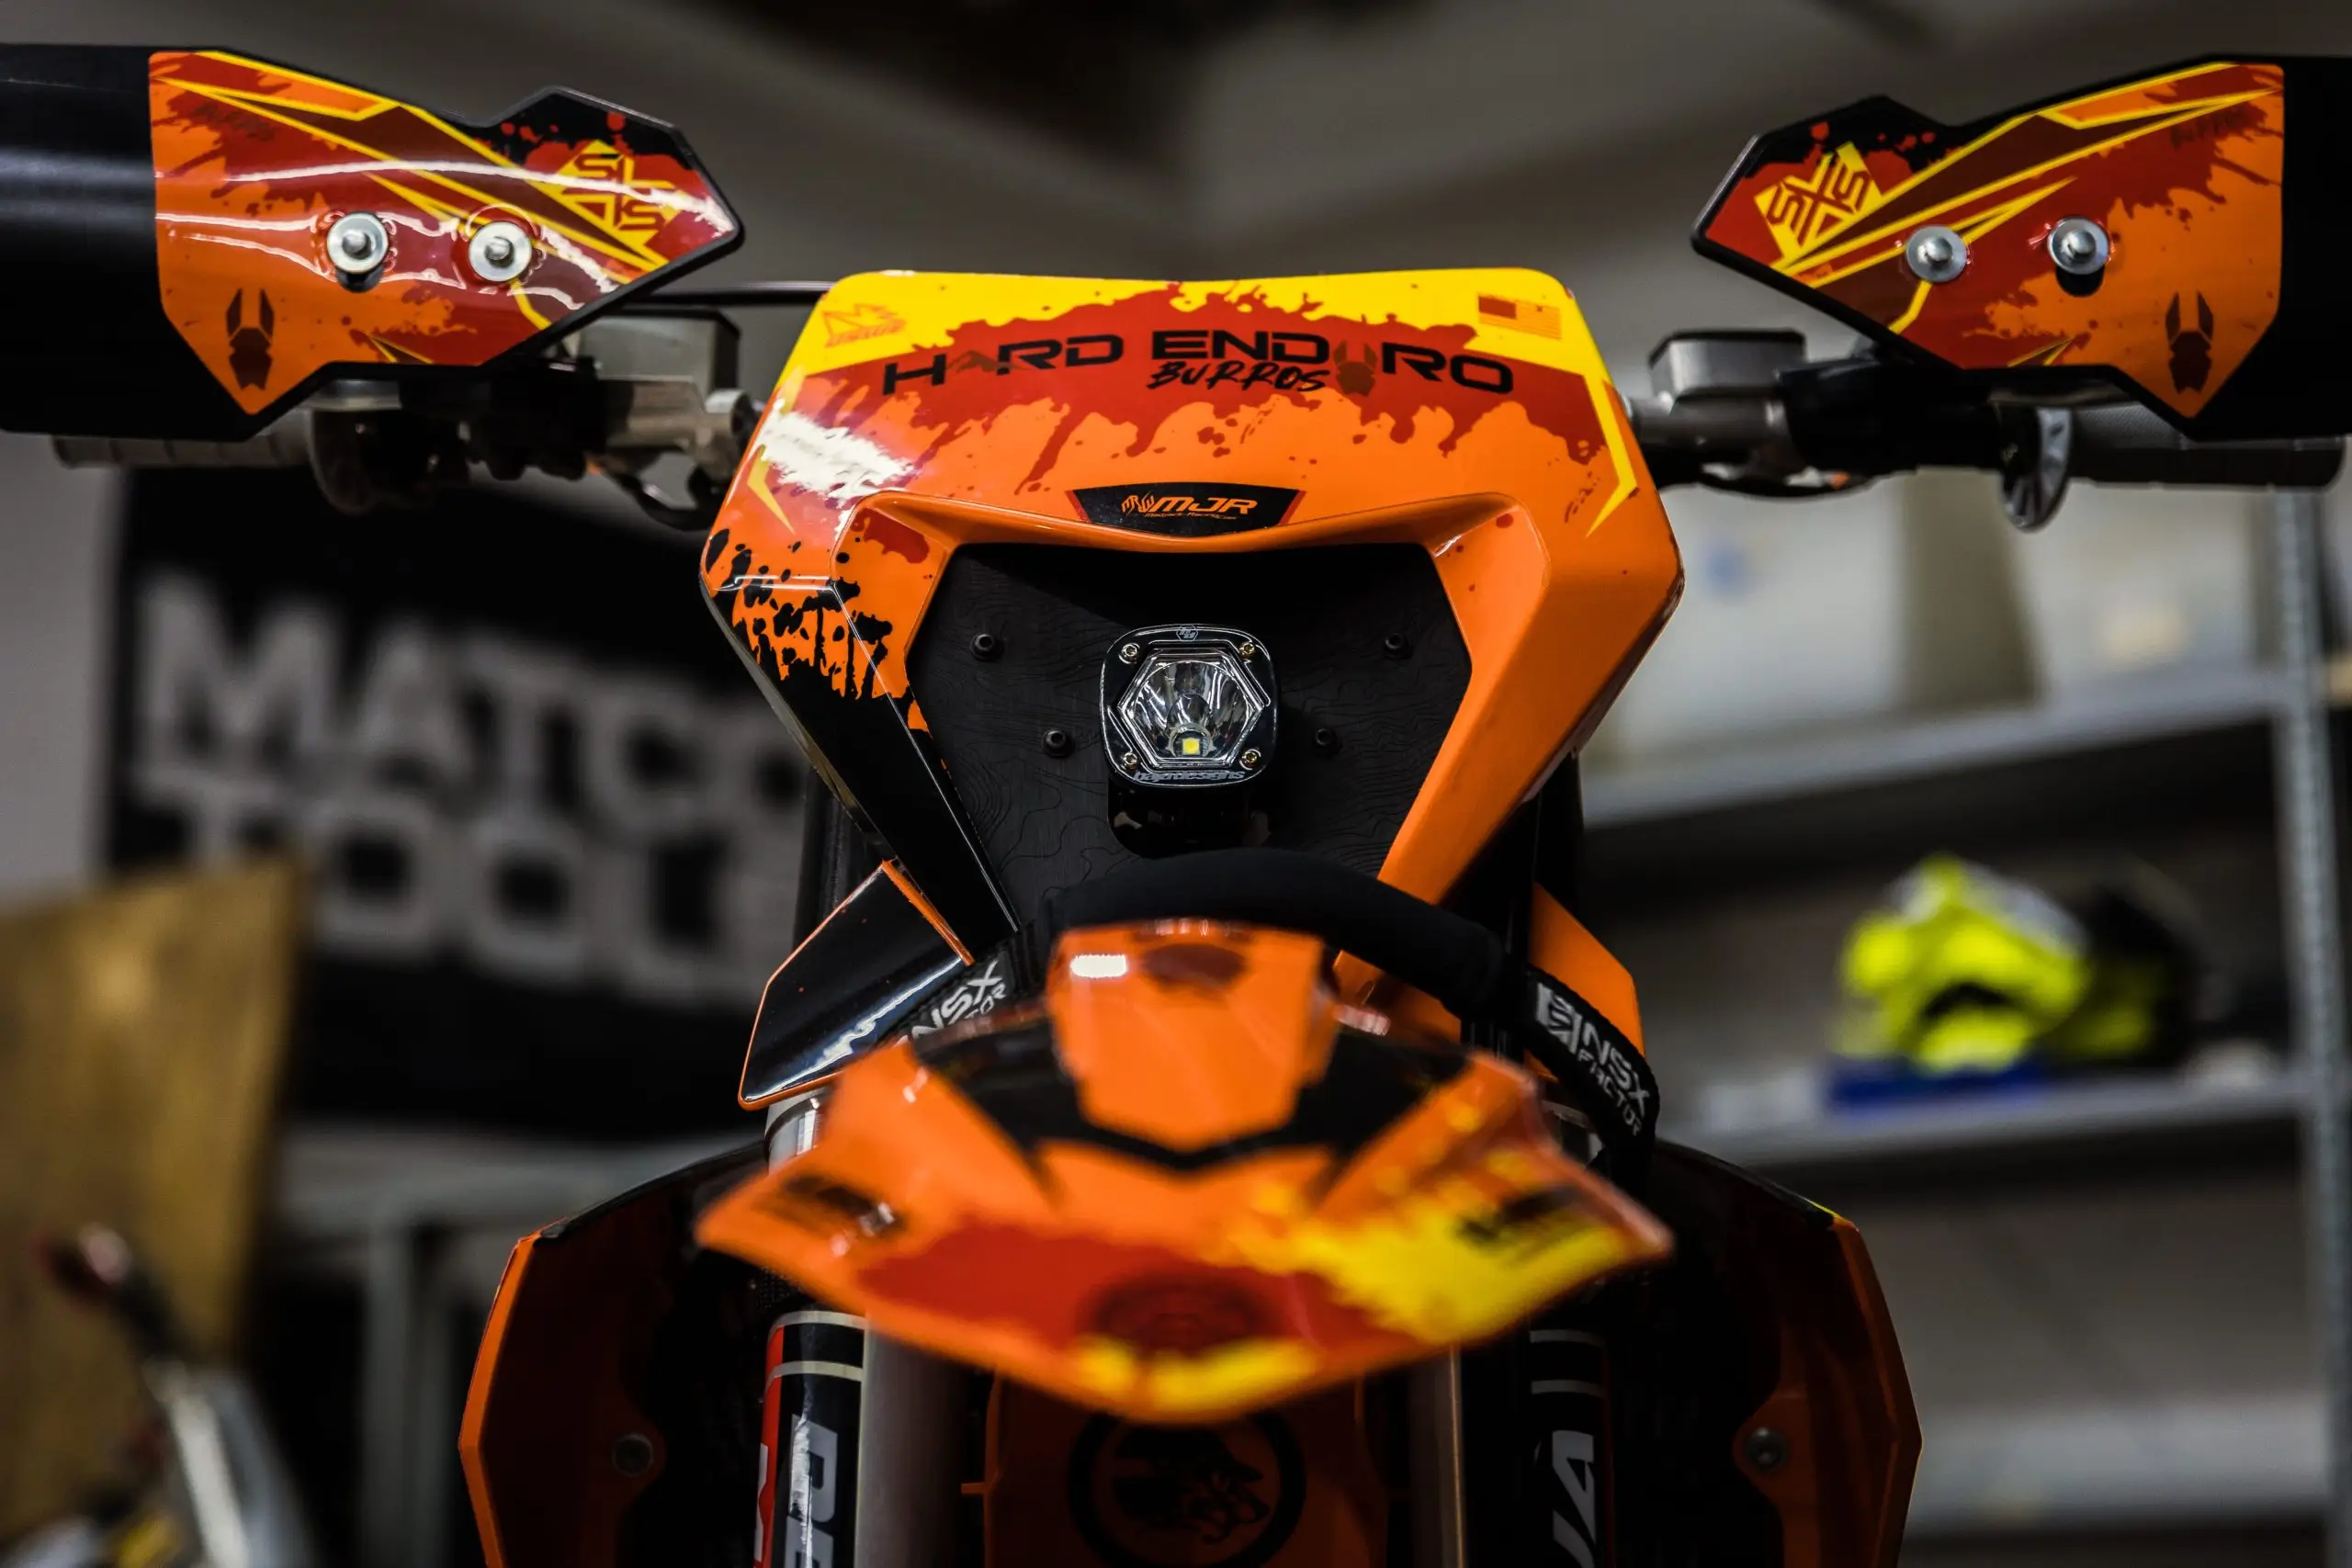
Hard enduro riding exposes bikes to large rock and log impacts, making protective components essential. SXS Skid Plates and Handguards are the tool of choice to safeguard the engine and hands from debris and impacts. What we like the most about the SXS lineup is that the handguards are extremely solid, even as a flag style hand guard. Typically flag style guards and flimsy and would barely protect your hands from roost. The SXS are built with solid aluminum brackets and routed UHMW so they can handle direct impacts to trees and rocks but also allow you to keep the forgiving bar flex feel of a flag style handguard. Where a lot of guys make the mistake is running a full wrap hand guard and then wondering why their bike feels very rigid and unforgiving on the big g-outs and hits.
One of the most abused portions of a hard enduro bike is the frame, as we’re always slamming rocks and logs on the daily. So, for frame protection we also went with the SXSslideplate as its designed with a thick sheet of bent UHMW that allows you to slide on obstacles vs a metal skid plate that will gauge and catch on obstacles. The SXS is far superior to other brands of UHMW slideplates because the plate is bent and held in tension with fasteners vs some brands that route a 45 deg angle, bend and glue to achieve the angles needed to protect the water pump and stator cover. SXS are hand made in the USA in North Idaho and they are an awesome crew that volunteer for course work and race the hard enduros regularly.
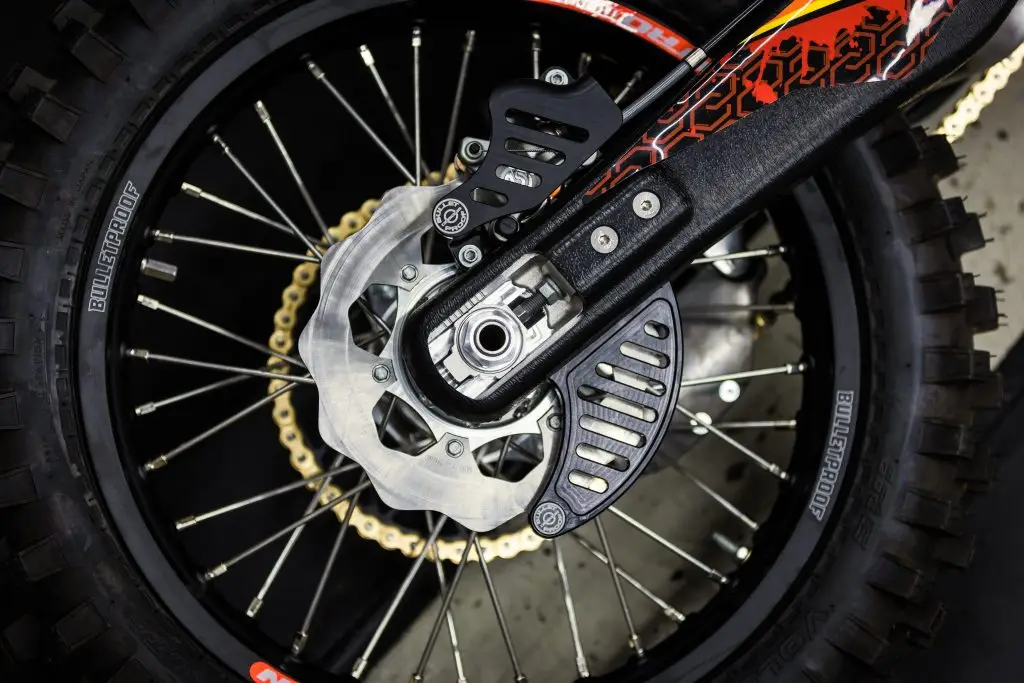
When it comes to protecting the swing arms from all the rock rash and abuse, we use the Crosslinked Components Swingarm Guards to help extend the lifespan and resale value of the bike by preventing swingarm wear. Probably one of the most common dirtbike part we find broken off at the races are competitor swing arm guards that are flimsy and only held on by zip ties. The Crosslinked design uses a metal tab attached to the axle adjuster bolt so its secured far beyond a zip tie. We have yet to break one off- believe me we’re trying!
Any proper hard enduro bike build has to have a dinner-date with some quality hard parts as the stock setup will leave many vulnerabilities, Bulletproof Designs makes very high end, strong and durable protection parts that can take a serious beating. They provided the radiator guards, chain guide tab, rear rotor guards, and a specialized Hard Enduro Burros edition clutch cover. Besides that, the crew over at Bulletproof is super active at the races and support the sport in many ways, they also offer a pretty crazy lifetime warranty on their parts. It’s an incredible commitment to the quality of their products and their confidence that the parts will endure extreme riding conditions.
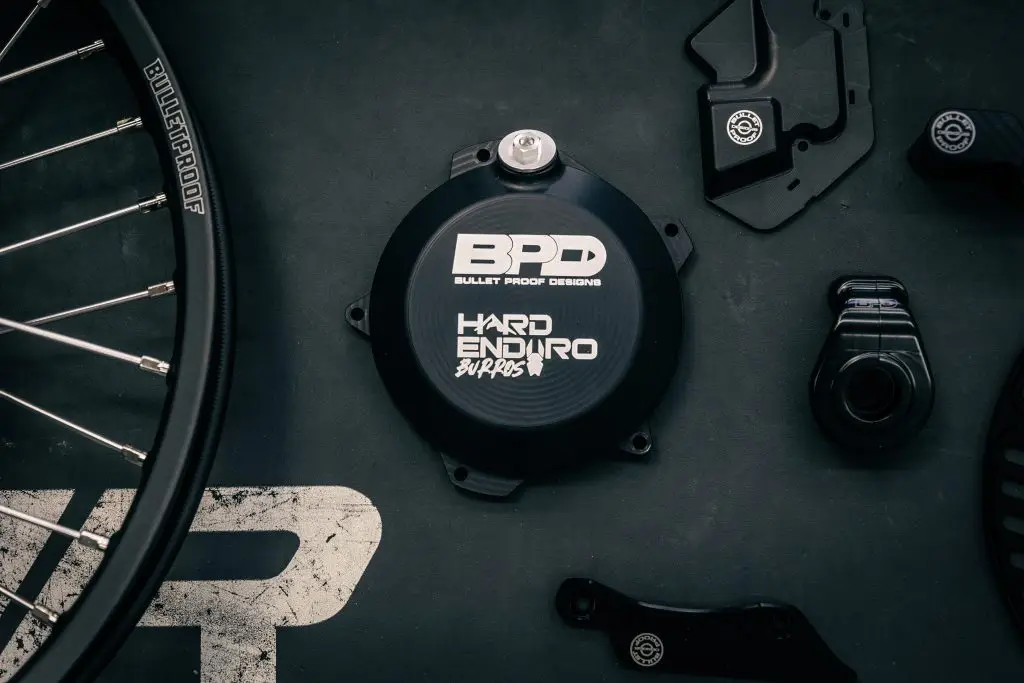

Lastly, since the TBI platform has a throttle body, having a protective cover is imperative as one big impact could render you inoperable out on the mountain. So, keeping in mind that we wanted to make this bike as durable as possible and try to reduce the number of weak points, we opted for the Bulletproof TBI cover as well.
Engine Performance: Tuning for Maximum Output
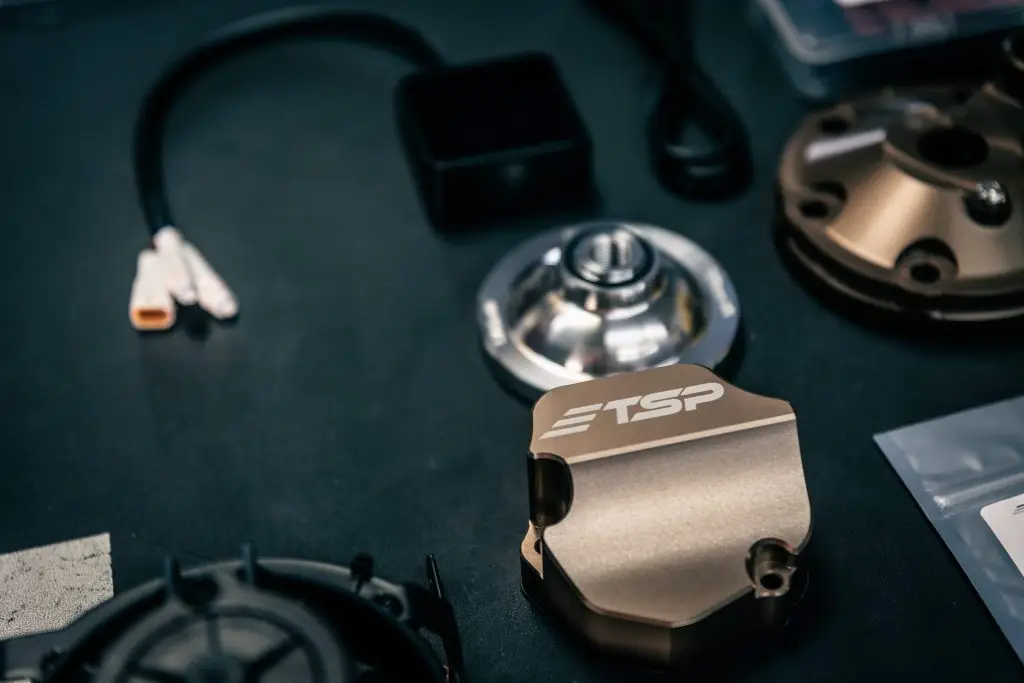
To unlock the full potential of the KTM 300 TBI motor, a selection of aftermarket performance parts was installed. The new TBI XC-W bikes come with a very muted factory tune so we looked to juice up the power this bike makes. We went with the TSP (Two Stroke Performance) Power Kit, which includes a high-compression head, a larger power valve cover for improved bottom-end power, and a remapped ECU via the TSP ERM (Electronic Racing Management). These modifications, sourced from Slavens Racing, provide noticeable improvements in throttle response and overall engine efficiency. This bike has to haul a 230-pound Blake with his 35–40-pound camera bag out to remote zones, often requiring a full throttle hill climb just to get to the film spots so having max horsepower while also maintaining the lugability of the bike was key. The TSP suite of power parts has far exceeded our expectations thus far.
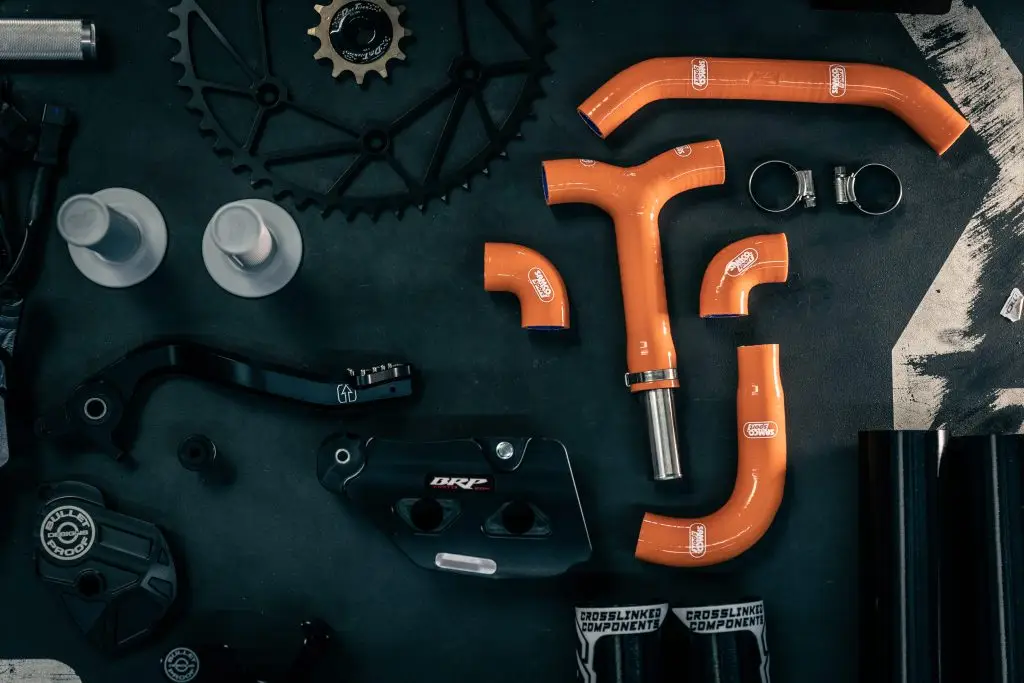
An FMF Factory Fatty Pipe and a Titanium Powercore 2.1 Silencer were added to optimize the exhaust system. The Factory Fatty Pipe is constructed with a stronger than stock steel, so it’s ideal for hard enduro conditions where rock dents are commonplace. In the spirit of reliability, the handmade in UK Samco Sport Silicone Hoses replace the stock coolant system, removing the thermostat to reduce potential failure points. In the past we have had the plastic thermostat crack and loose coolant, affectively ending the day of riding. As for coolant we stuck with engine ice this go around. In past bikes we’ve opted for Evans as it runs cooler and is waterless but the issue is if you happen to have a leak or overheat on the trail, its far less ideal to add water to the Evans (as it defeats the purpose of being waterless) vs Engine Ice you can add a little water from your USWE pack and be on your way without issue.
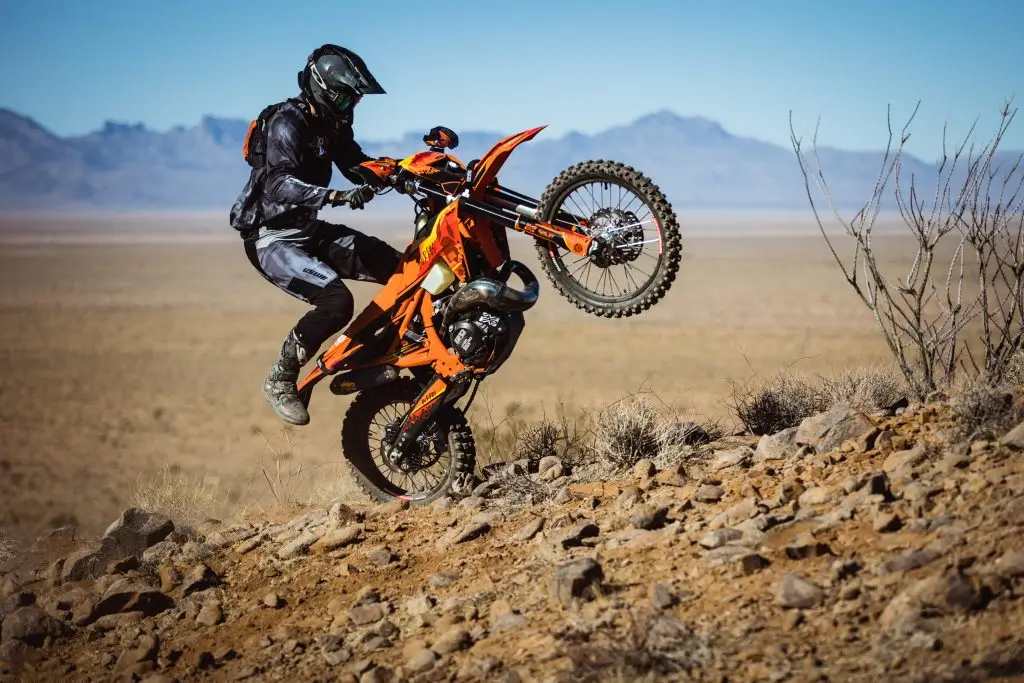
Suspension Upgrades: Precision Handling for Extreme Terrain
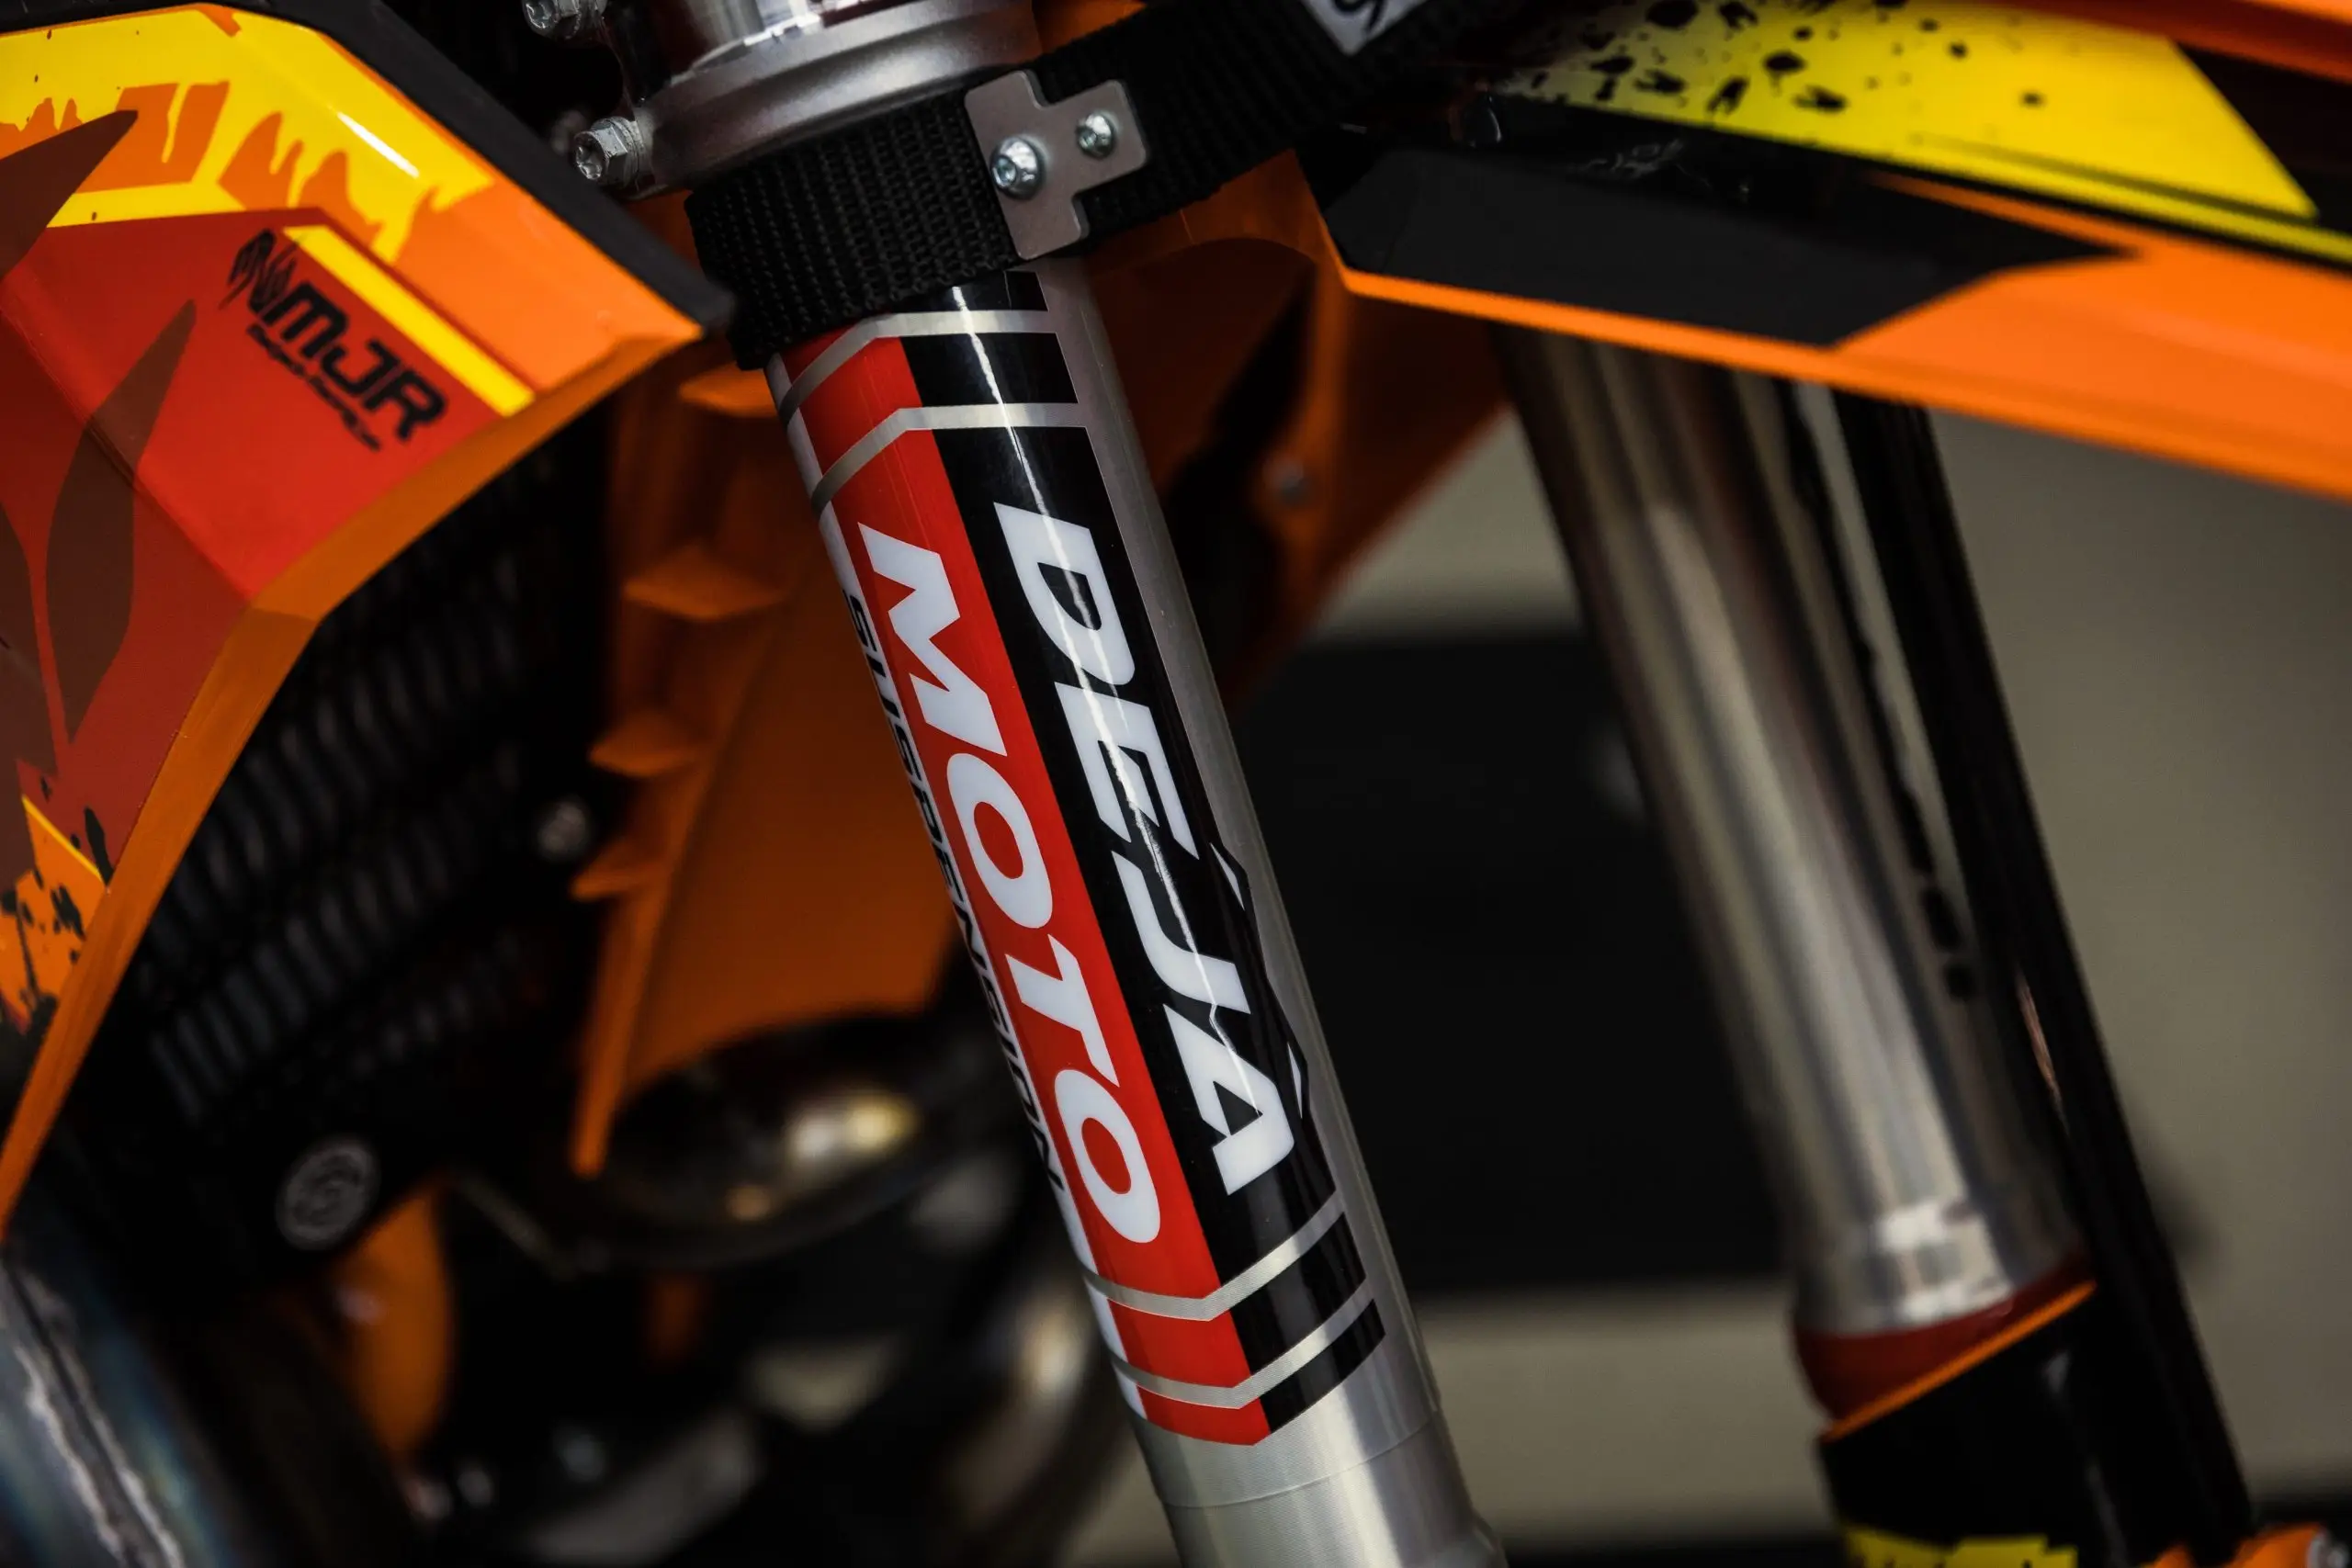
Suspension tuning is a critical element in a hard enduro bike’s setup. For this build, the suspension is entrusted to Mike at Deja Moto, a specialist in off-road and hard enduro setups. While we entertained a Cone Valve setup on this bike, we ultimately went with a 6500 Cartridge Kit in the front forks as the consensus is that the Cone Valves have a stiffer fork tube so you have to compensate by going even softer on the valving thus making it harder to tune exactly how we’d like. Additionally, the components are more expensive to replace so for a hard enduro use case where things get absolutely bashed and beat up, it didn’t seem worth it. So far the 6500 kit has been amazing as the hold up at the very end of the stroke is incredible while also having a plush first several inches of travel. As for the rear end of the bike we went with the WP Xact Pro Trax shock as it is the closest thing to “best of both worlds” you can get when it comes to having a subtle top of stroke and incredible hold up at the bottom of the stroke for the big single impacts. At the time of this bike build we didn’t have the new suspension yet but got it on there shortly after completion and have put over 80 hours on it thus far. Working with Mike at Deja Moto has been awesome because he’s a no nonsense, no bullsh$t kind of guy and that’s refreshing in the world of suspension tuning. There’s a fair bit of snake oil out there so it’s good to find someone who understands hard enduro intimately and can tailor your components to match. He worked with us extensively to understand the bike’s use case and my style of riding. Overall, these suspension upgrades ensure optimal handling, better impact absorption, and increased rider confidence in challenging terrain. The valving we have on the bike performs well in the slow technical hard enduro riding with a bit faster rebound but can also hand the big hits with a 240-270 pound payload. Hit up Mikey at Deja Moto to get your bike setup proper. He’s 100% Burros approved.

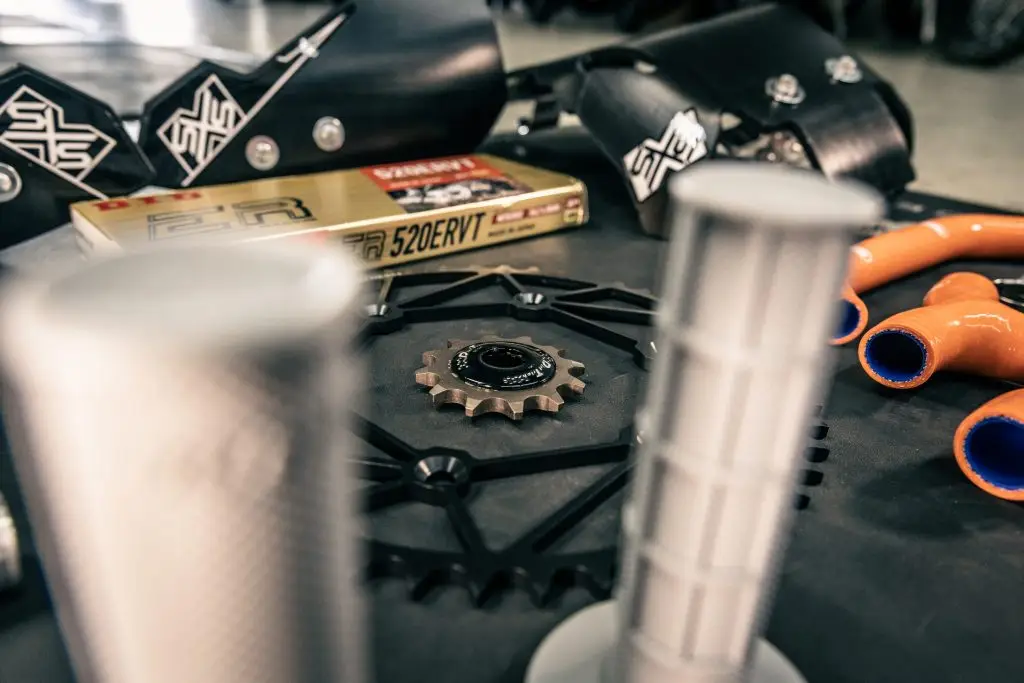
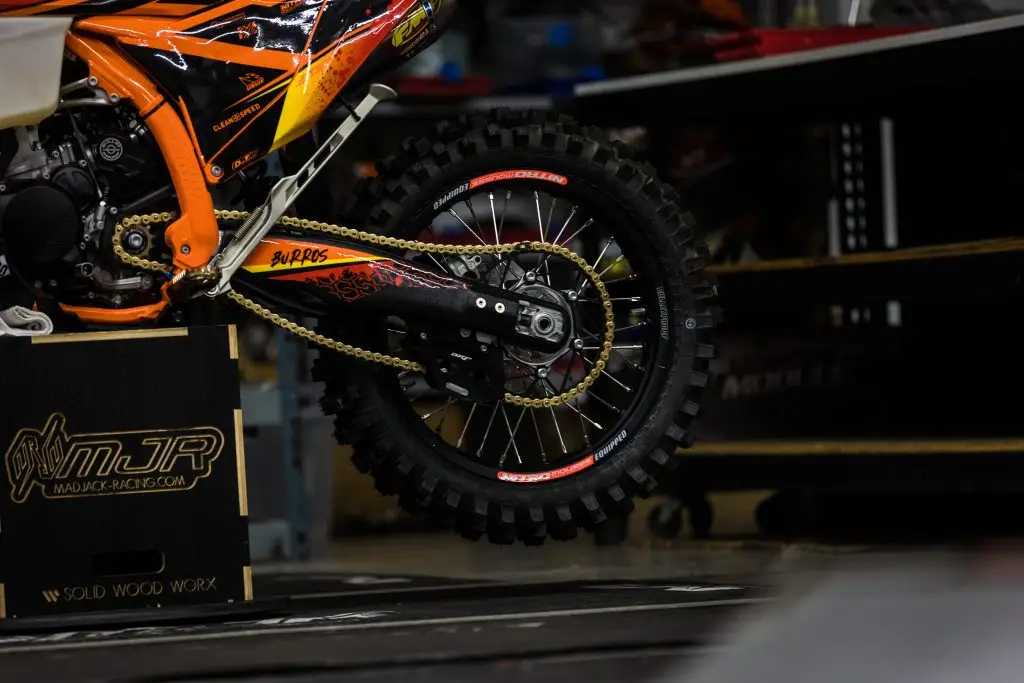
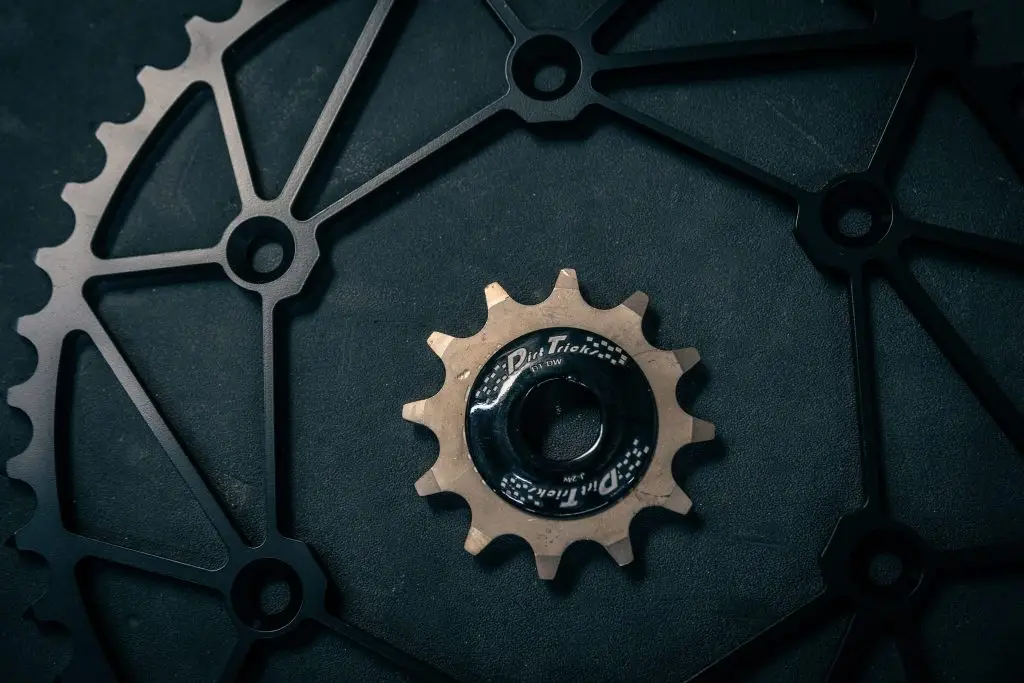
When it comes to the drivetrain of the bike, we exclusively trust Dirt Tricks Sprockets and DID Gold series chains. If you start out with the best components money can buy, there’s a much lesser chance of breaking a chain or a sprocket. We went with a 12/48 setup for optimal gearing for hard enduro, making 2nd gear a little shorter so it’s now the go-to gear for splats and double blips. The icing on the cake is that the Dirt Tricks sprockets are made in the USA and have a 3-year warranty. The trend around here is to find quality products backed by solid warranties because hard enduro demands a lot of your bike and it’ components.
Wheels & Tires: Maximizing Traction and Control
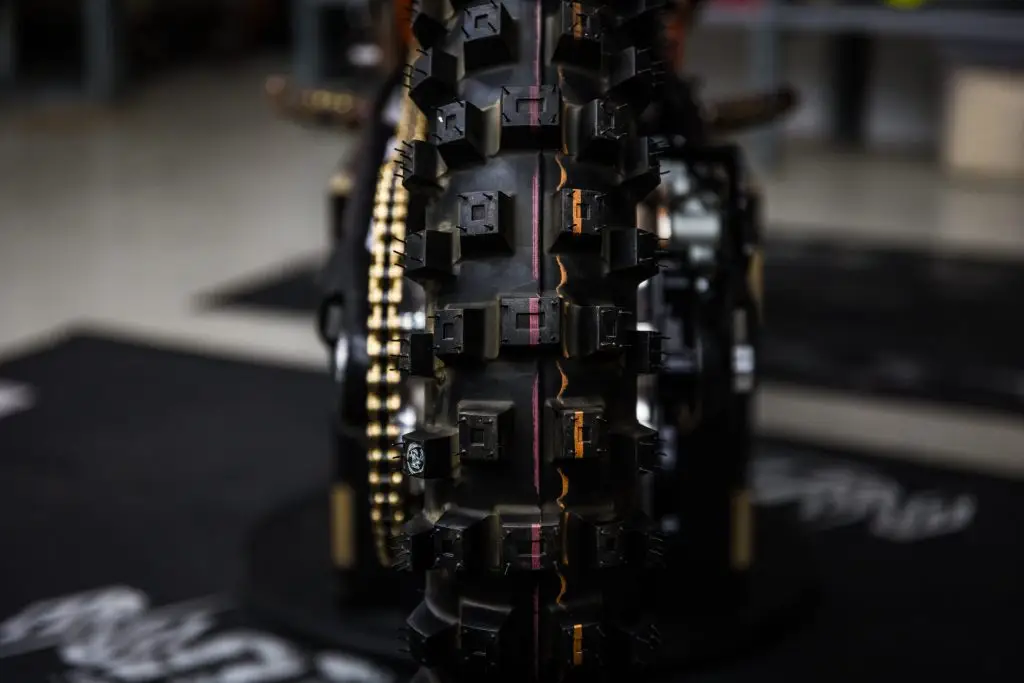
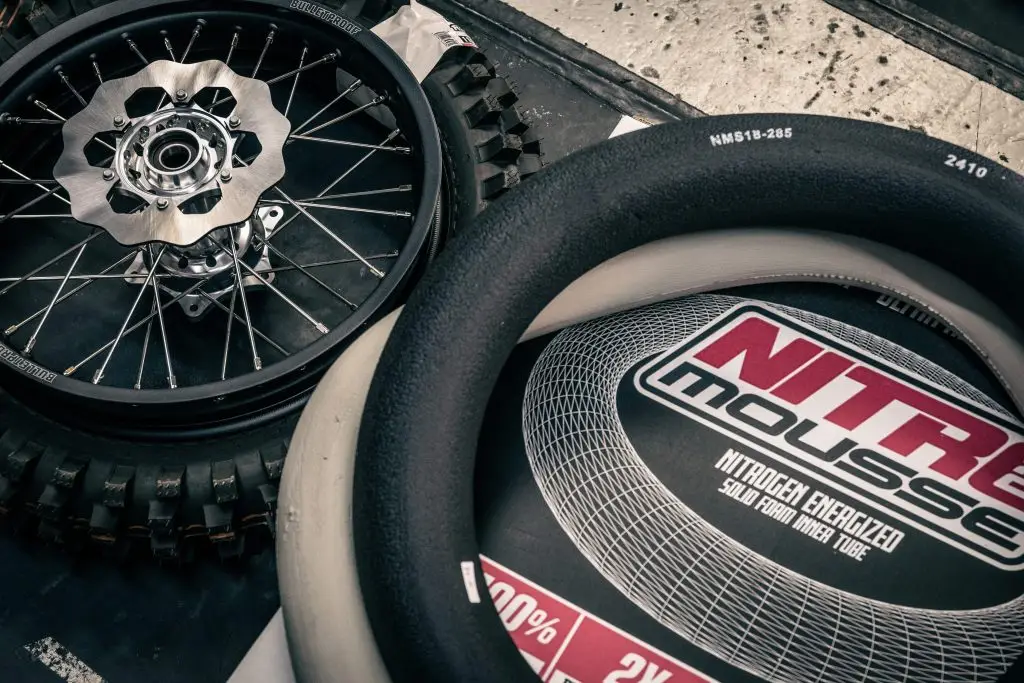
Traction is everything in hard enduro, and this build utilizes IRC Tires, a well-respected brand within the sport and one of our trusted Burros sponsors. Our two go-to tires are the JX8 gummy for all things slabby rock style riding. It’s a proven racing tire and is the tire of choice for Cody Webb on his new Yamaha program. It has a soft carcass and soft lugs that, when combined with the tread pattern, really hook up on rocks, roots and slippery terrain. We also absolutely LOVE the IRC VE-33S as a do-it-all kind of tire. The taller and larger lugs really hook up when the terrain is a little looser where more wheel spin is inherent. It is a singletrack-slayer type tire and for alpine zones its our summer season tire of choice. Scoop one up at Slavens Racing and you wont be disappointed! It’s still a partial gummy so the lugs are still quite soft and when paired with a soft Nitromousse, it really can EAT! We go with a NMS-285 plushie Nitro Mousse in the rear to eliminate the risk of flat tires and it has a feel of 6-8 PSI when properly fitted with a 110/100/18 VE33S.For the front I like the IRC VX-40F 80/100/21 with a very stiff Platinum Nitromousse NM-220. What I’ve learned over the years is a soft and worn-out front mousse will actually make the bike’s suspension handle really poorly. Effectively, when the mousse is too soft and you hit a rock, the tire and mousse will actually collapse in and absorb the impact thus not allowing the forks to do the work. It gives it a “dead” feel and can deflect your front end. Conversely, with a stiff front mousse like we run, the forks will do the heavy lifting and you’ll be amazed at how much plusher your front end feels in the rocks!

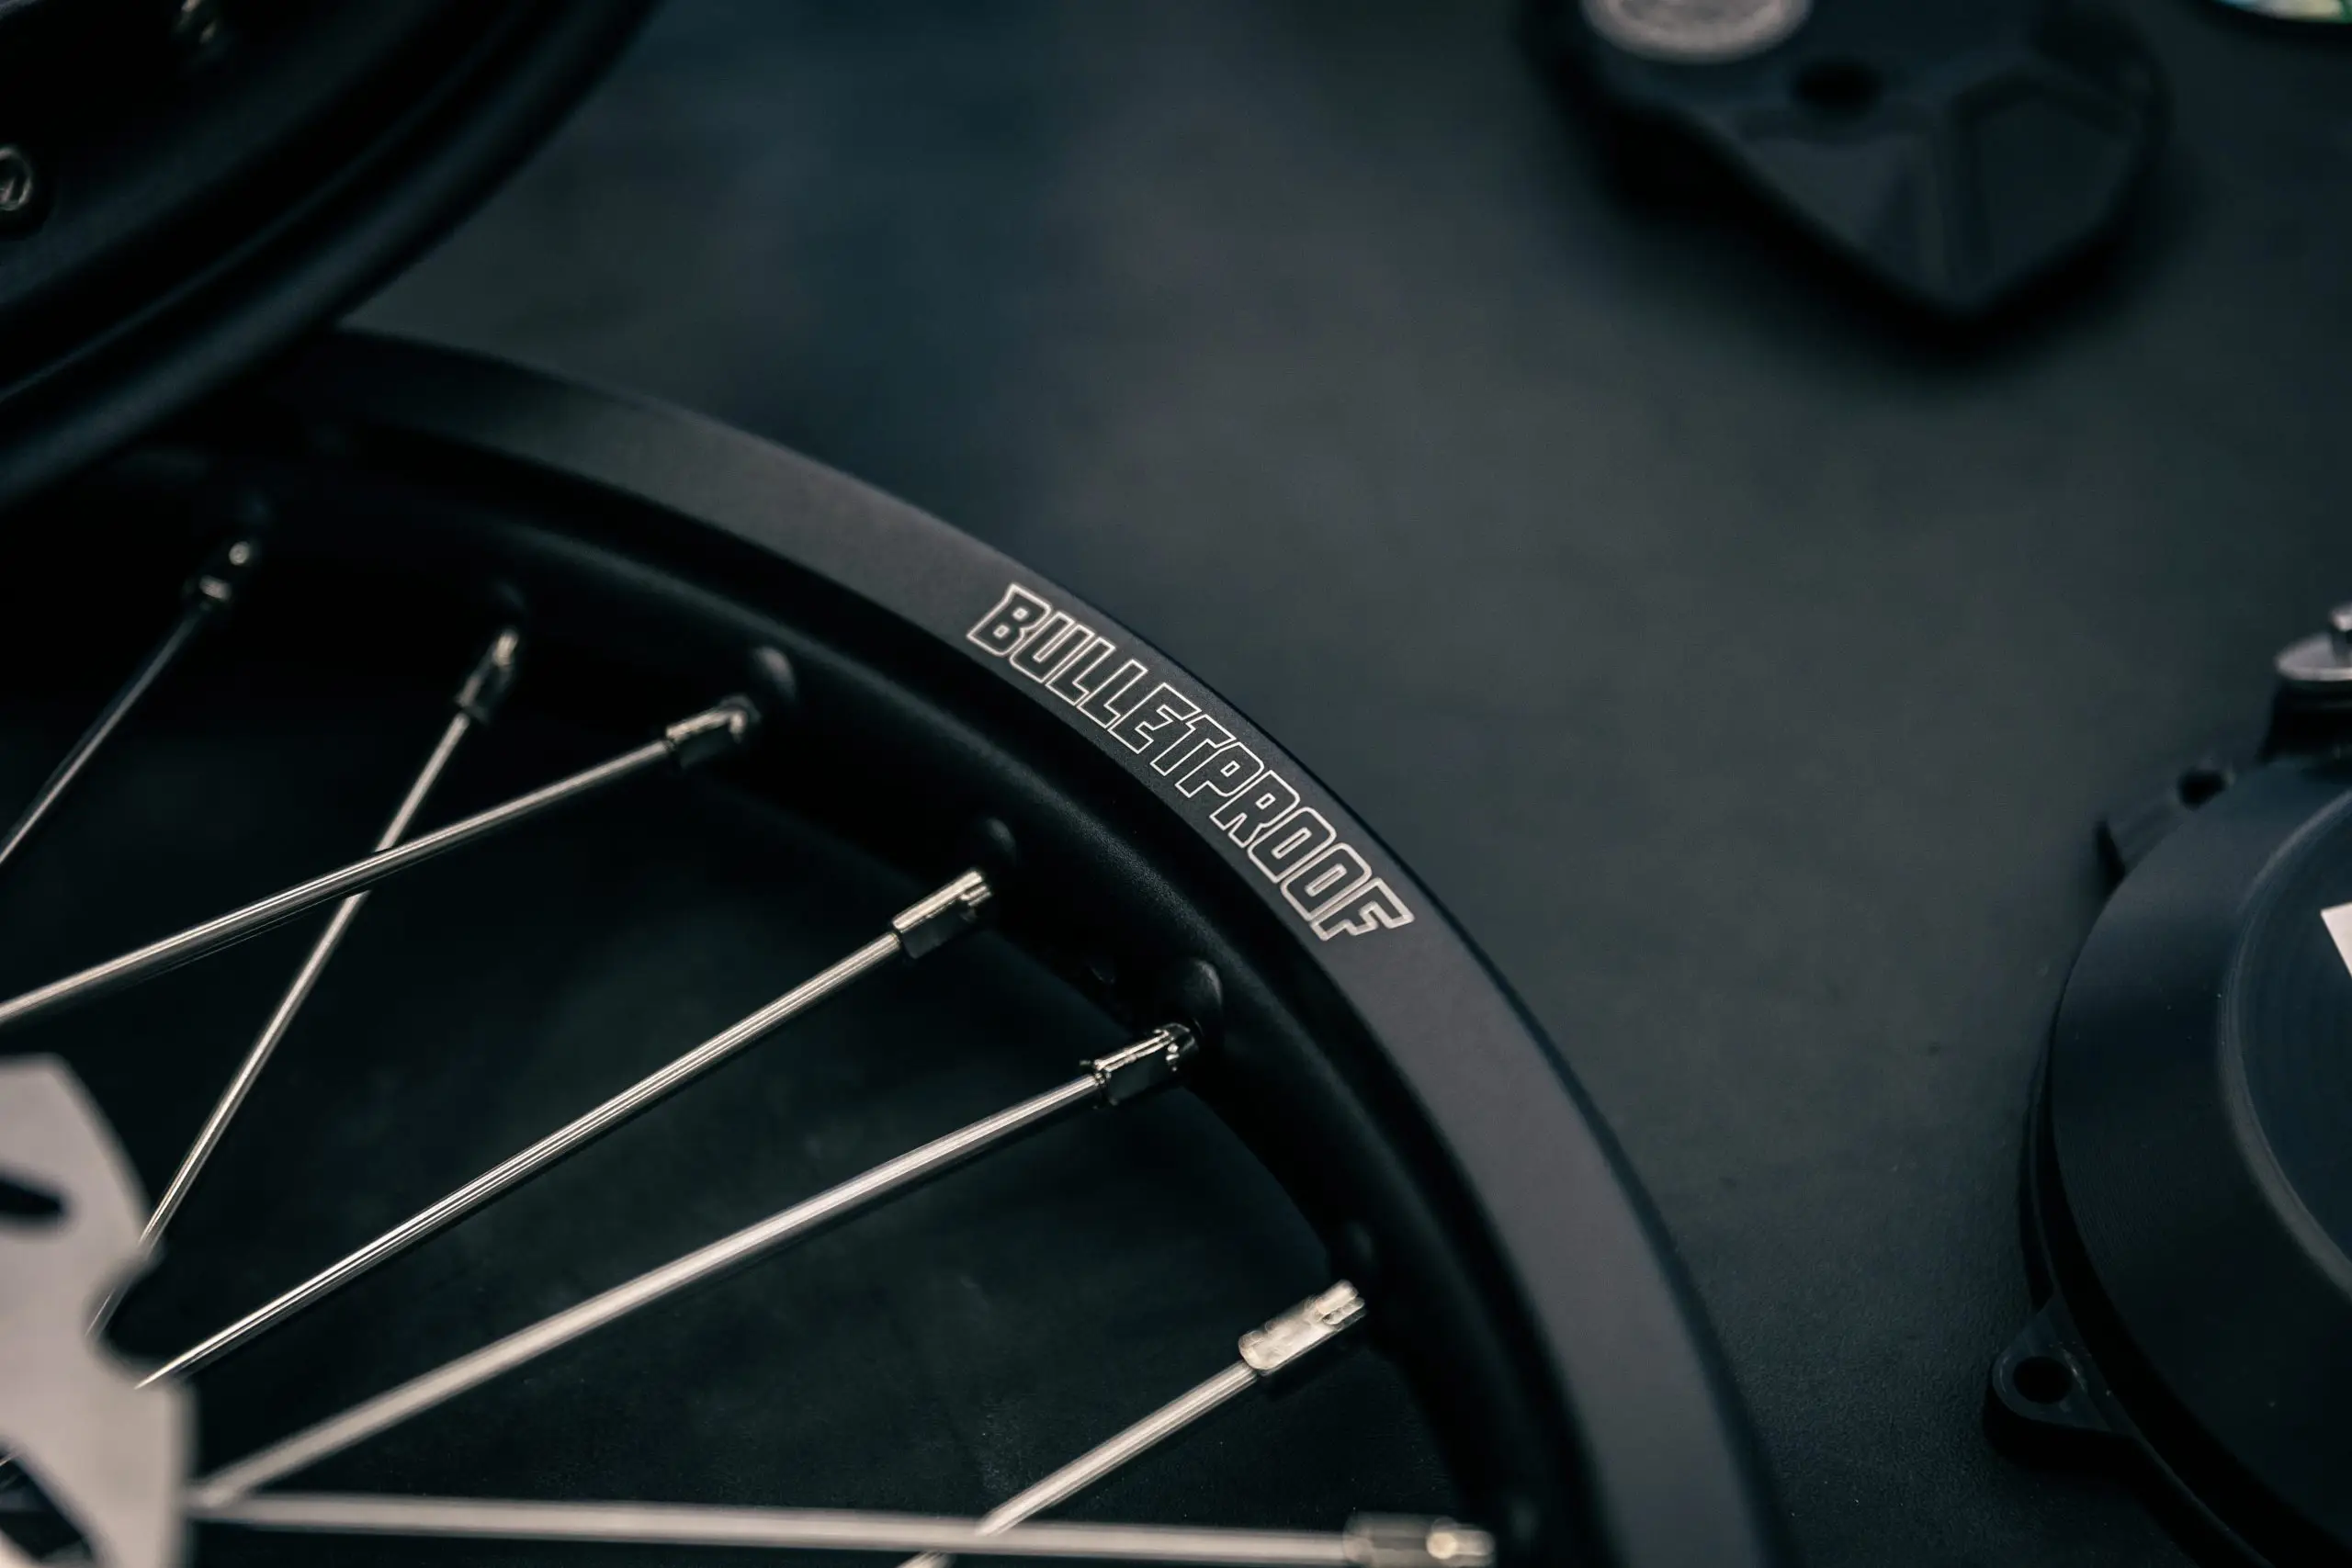
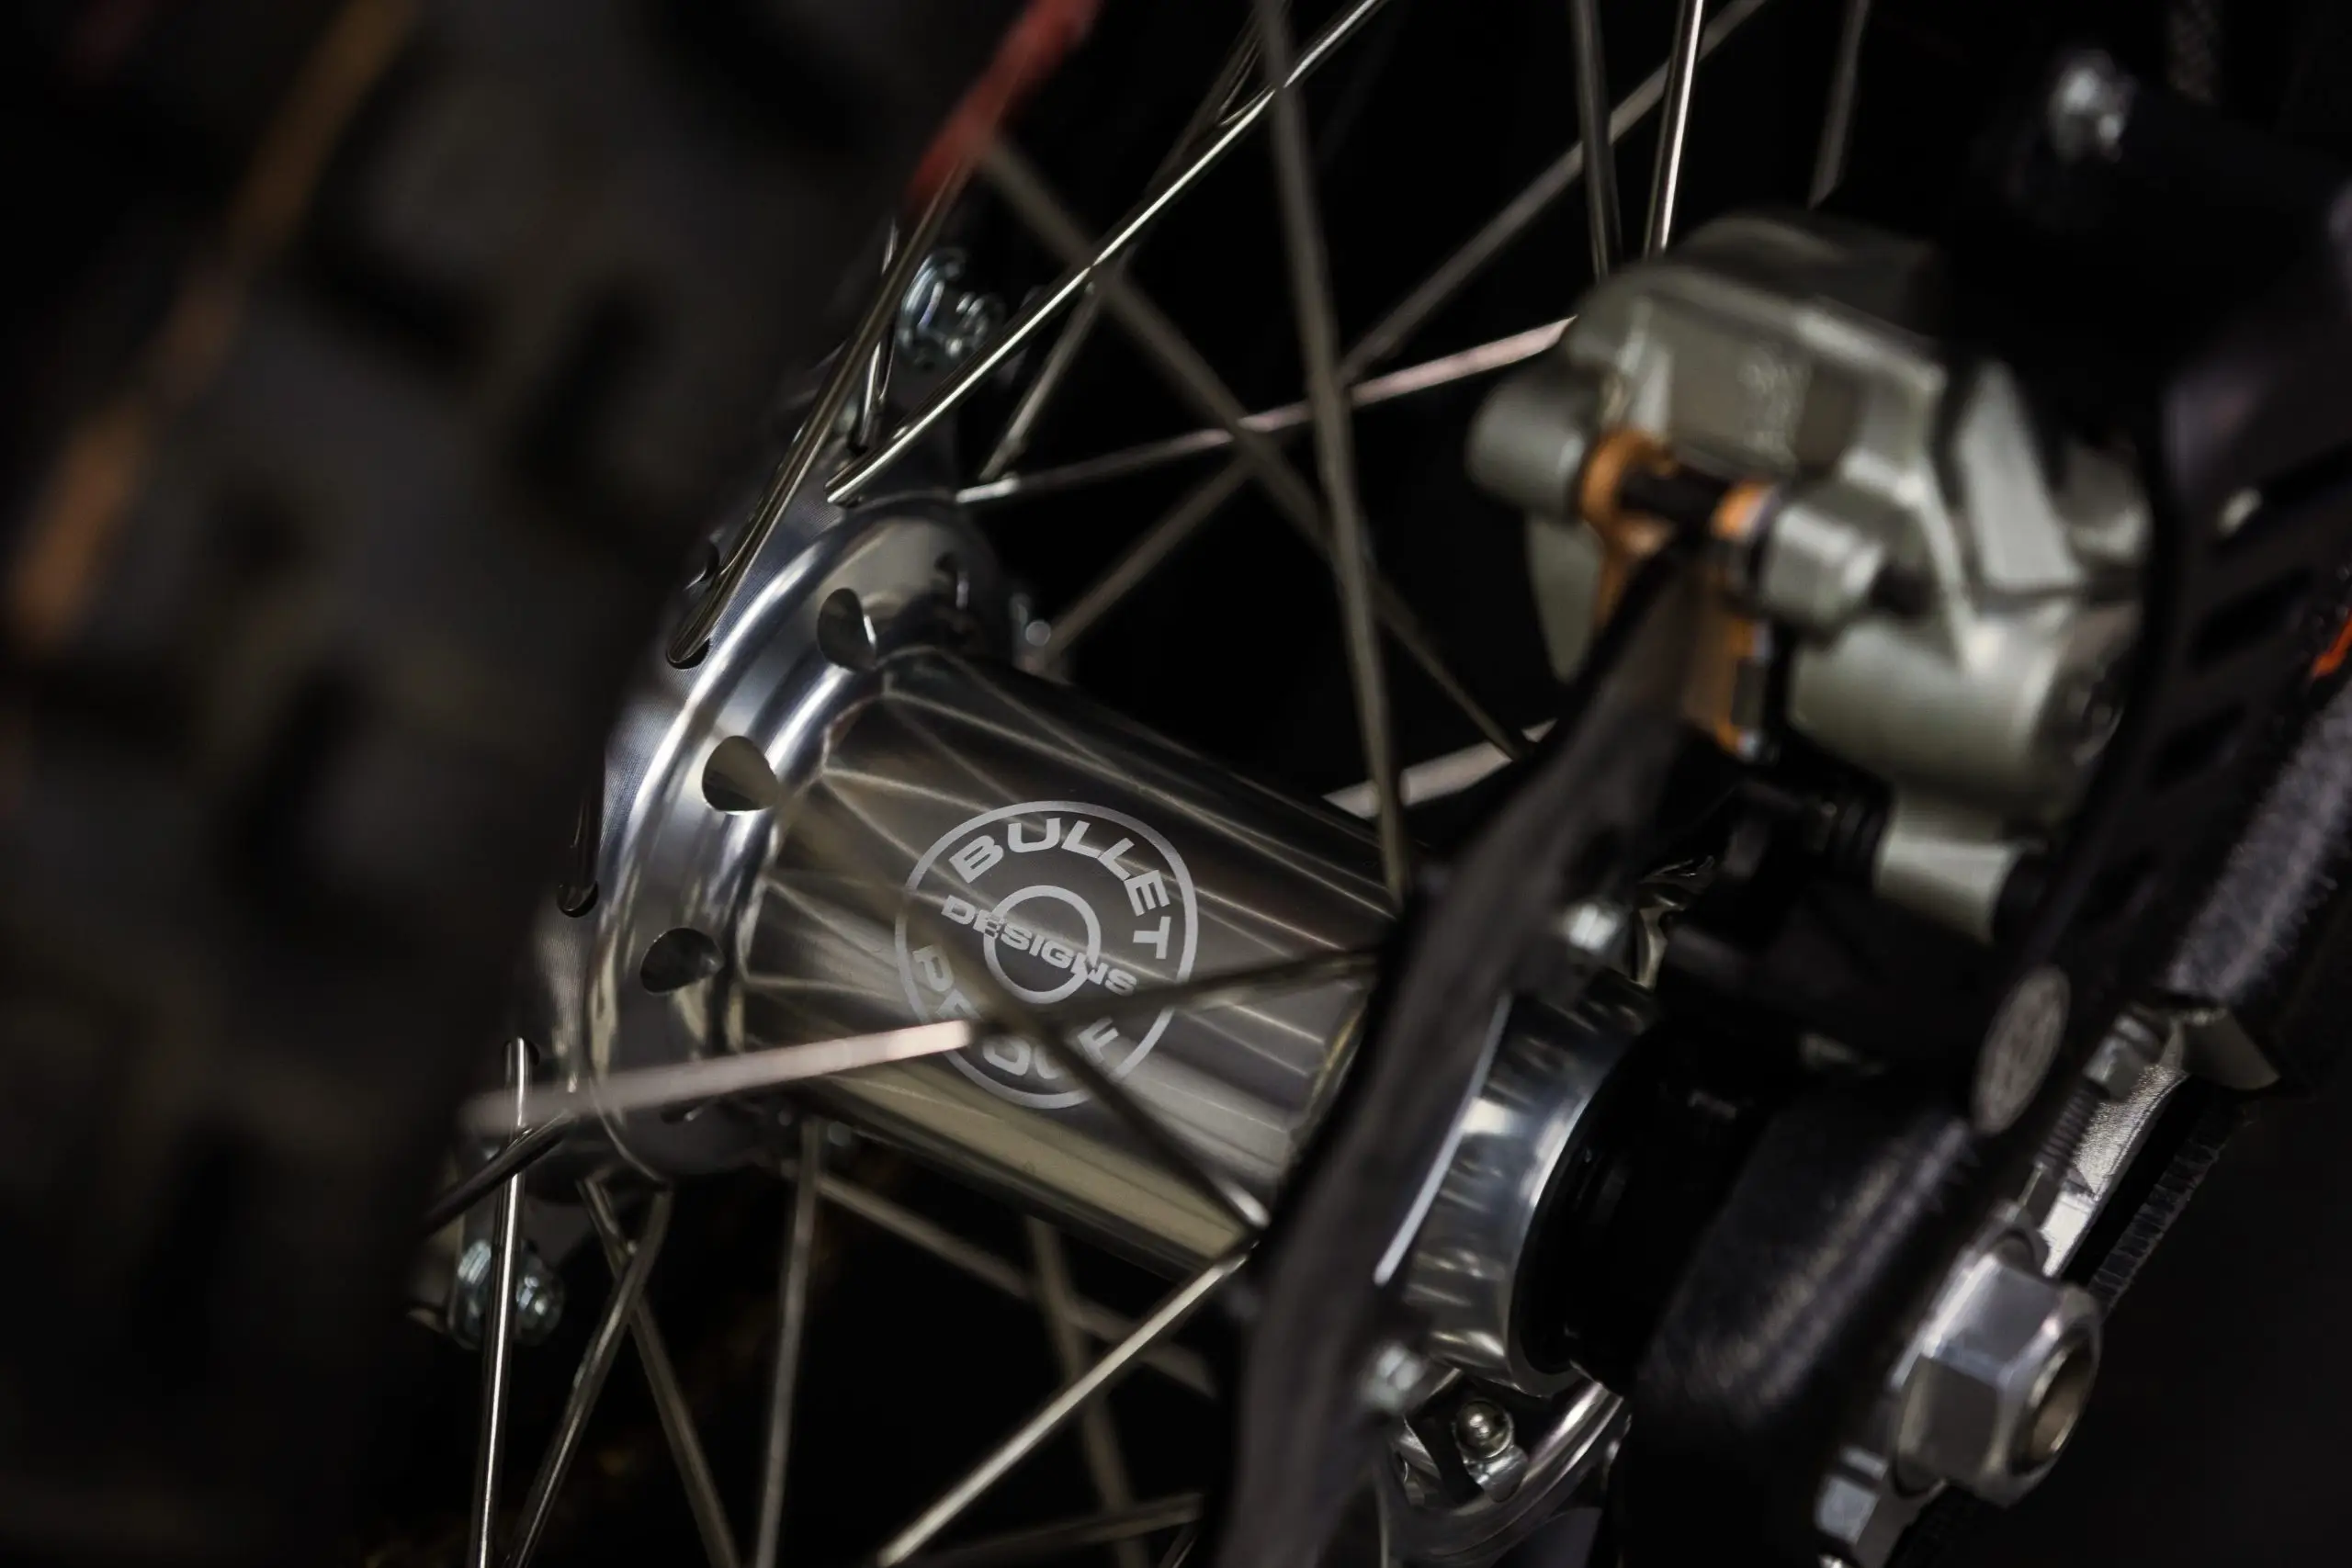
For wheels we couldn’t miss running Bulletproof Designs Wheels, featuring CNC-milled hubs because they offer increased stiffness and durability. Hard enduro riding is brutal on rims between the splats and the rock gardens so it’s nice to have a tougher wheel setup. Lastly, to reduce mousse wear in the wheel setup, the rims are triple-wrapped in industrial-grade 3M duct tape to prevent spokes from rubbing on the mousses prematurely.
Braking System: Precision and Control
Braking performance is essential in technical riding conditions. Clean Speed’s innovative brake lever system is extremely beefy and features a near pedal design. This allows riders to shift their weight further back by dropping their heals, thus improving rear-wheel traction. Additionally, a custom spring setup enhances brake feel, giving the bike’s rear brake a much better modulation and control. It’s one of my favorite inexpensive upgrades to improve the controls on the bike.
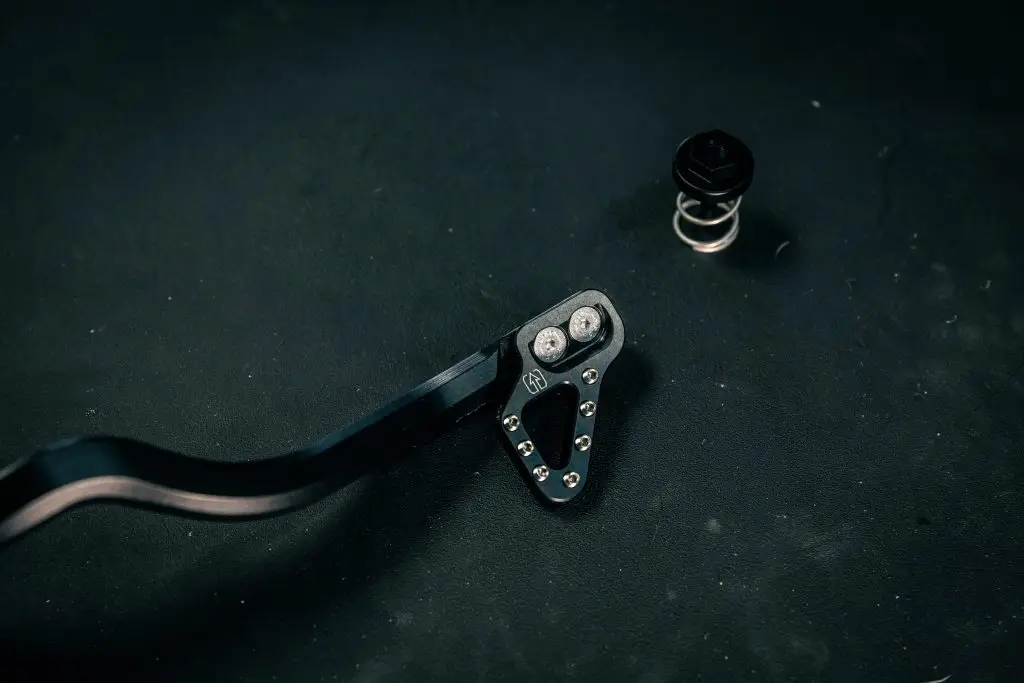
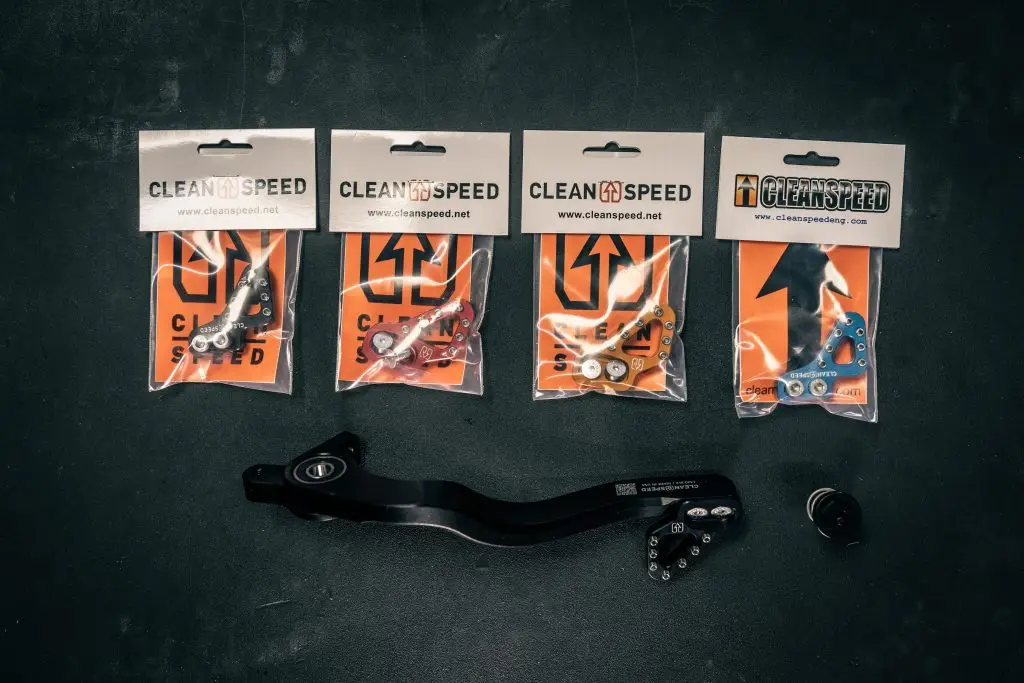
On an install note, to secure the brake pin, a safety wire tie technique is used to prevent unexpected failures. The stock brake clip can be easily popped off while riding in the rocks due to an unexpected impact. It’s happened to me multiple times so now I just do this extra step as a matter of course to make sure it doesn’t happen again. Given the harsh impacts of hard enduro, securing brake components properly is a small, but crucial detail.
Electrical & Controls: Customizing the Cockpit
For improved reliability, the stock ignition switch is replaced with an Enduro Engineering dual switch setup, providing a more responsive start function. Additionally, a Nihilo Concepts Secondary Start Switch is wired into the system as a backup in case of a malfunction. The new 2024+ stock start/stop integrated switch is known to fail and also has a terrible button feel. It also limits the ability to have the start on the left and kill switch on the right. The reason why the majority of the hard enduro pros do this switch is because when you’re stuck on a steep hill and you need to re-start the bike quick before rolling back, you can much easily apply gas from the right hand while also simultaneously pressing the start button at the same time with the clutch hand. With the stock setup it’s hard to grip the throttle and use your thumb to start at the same time. It’s a small change but equates to a lot more control in tricky situations.
I also opted for a ZRT throttle tube with an internal bearing setup, paired with a Bulletproof Designs billet throttle housing because it gives the throttle tube a super smooth feel for many engine hours to come, all while strengthening the tube (since its aluminum and not plastic lock on style grips anymore). It’s a two-part gain but the ZRT requires you to use glue on grips but that’s actually a good thing if you ask me because I got sick and tired of wrecking my hands getting them pinched between the metal bar end and a rock slab on a crash. I have a buddy who just broke his finder at the Grindingstone race when his metal bar end pinched his finger. Don’t be like Terry! Get a set of Pro Super Soft ODI glue on grips or Renthal Softs. They only come in white but they are very cushy and for $11 a set I don’t mind replacing them a little more frequently in order to have the softest grip out there. Lastly, it’s something no one really talks about but the stock plastic lock on grip style results in a thinner amount of soft rubber on the grip in order to accommodate for the need for the plastic tube. So the grips are a larger diameter which means it’s hard to grip AND it’s not as soft at the same time. Ditch the lock-ons!


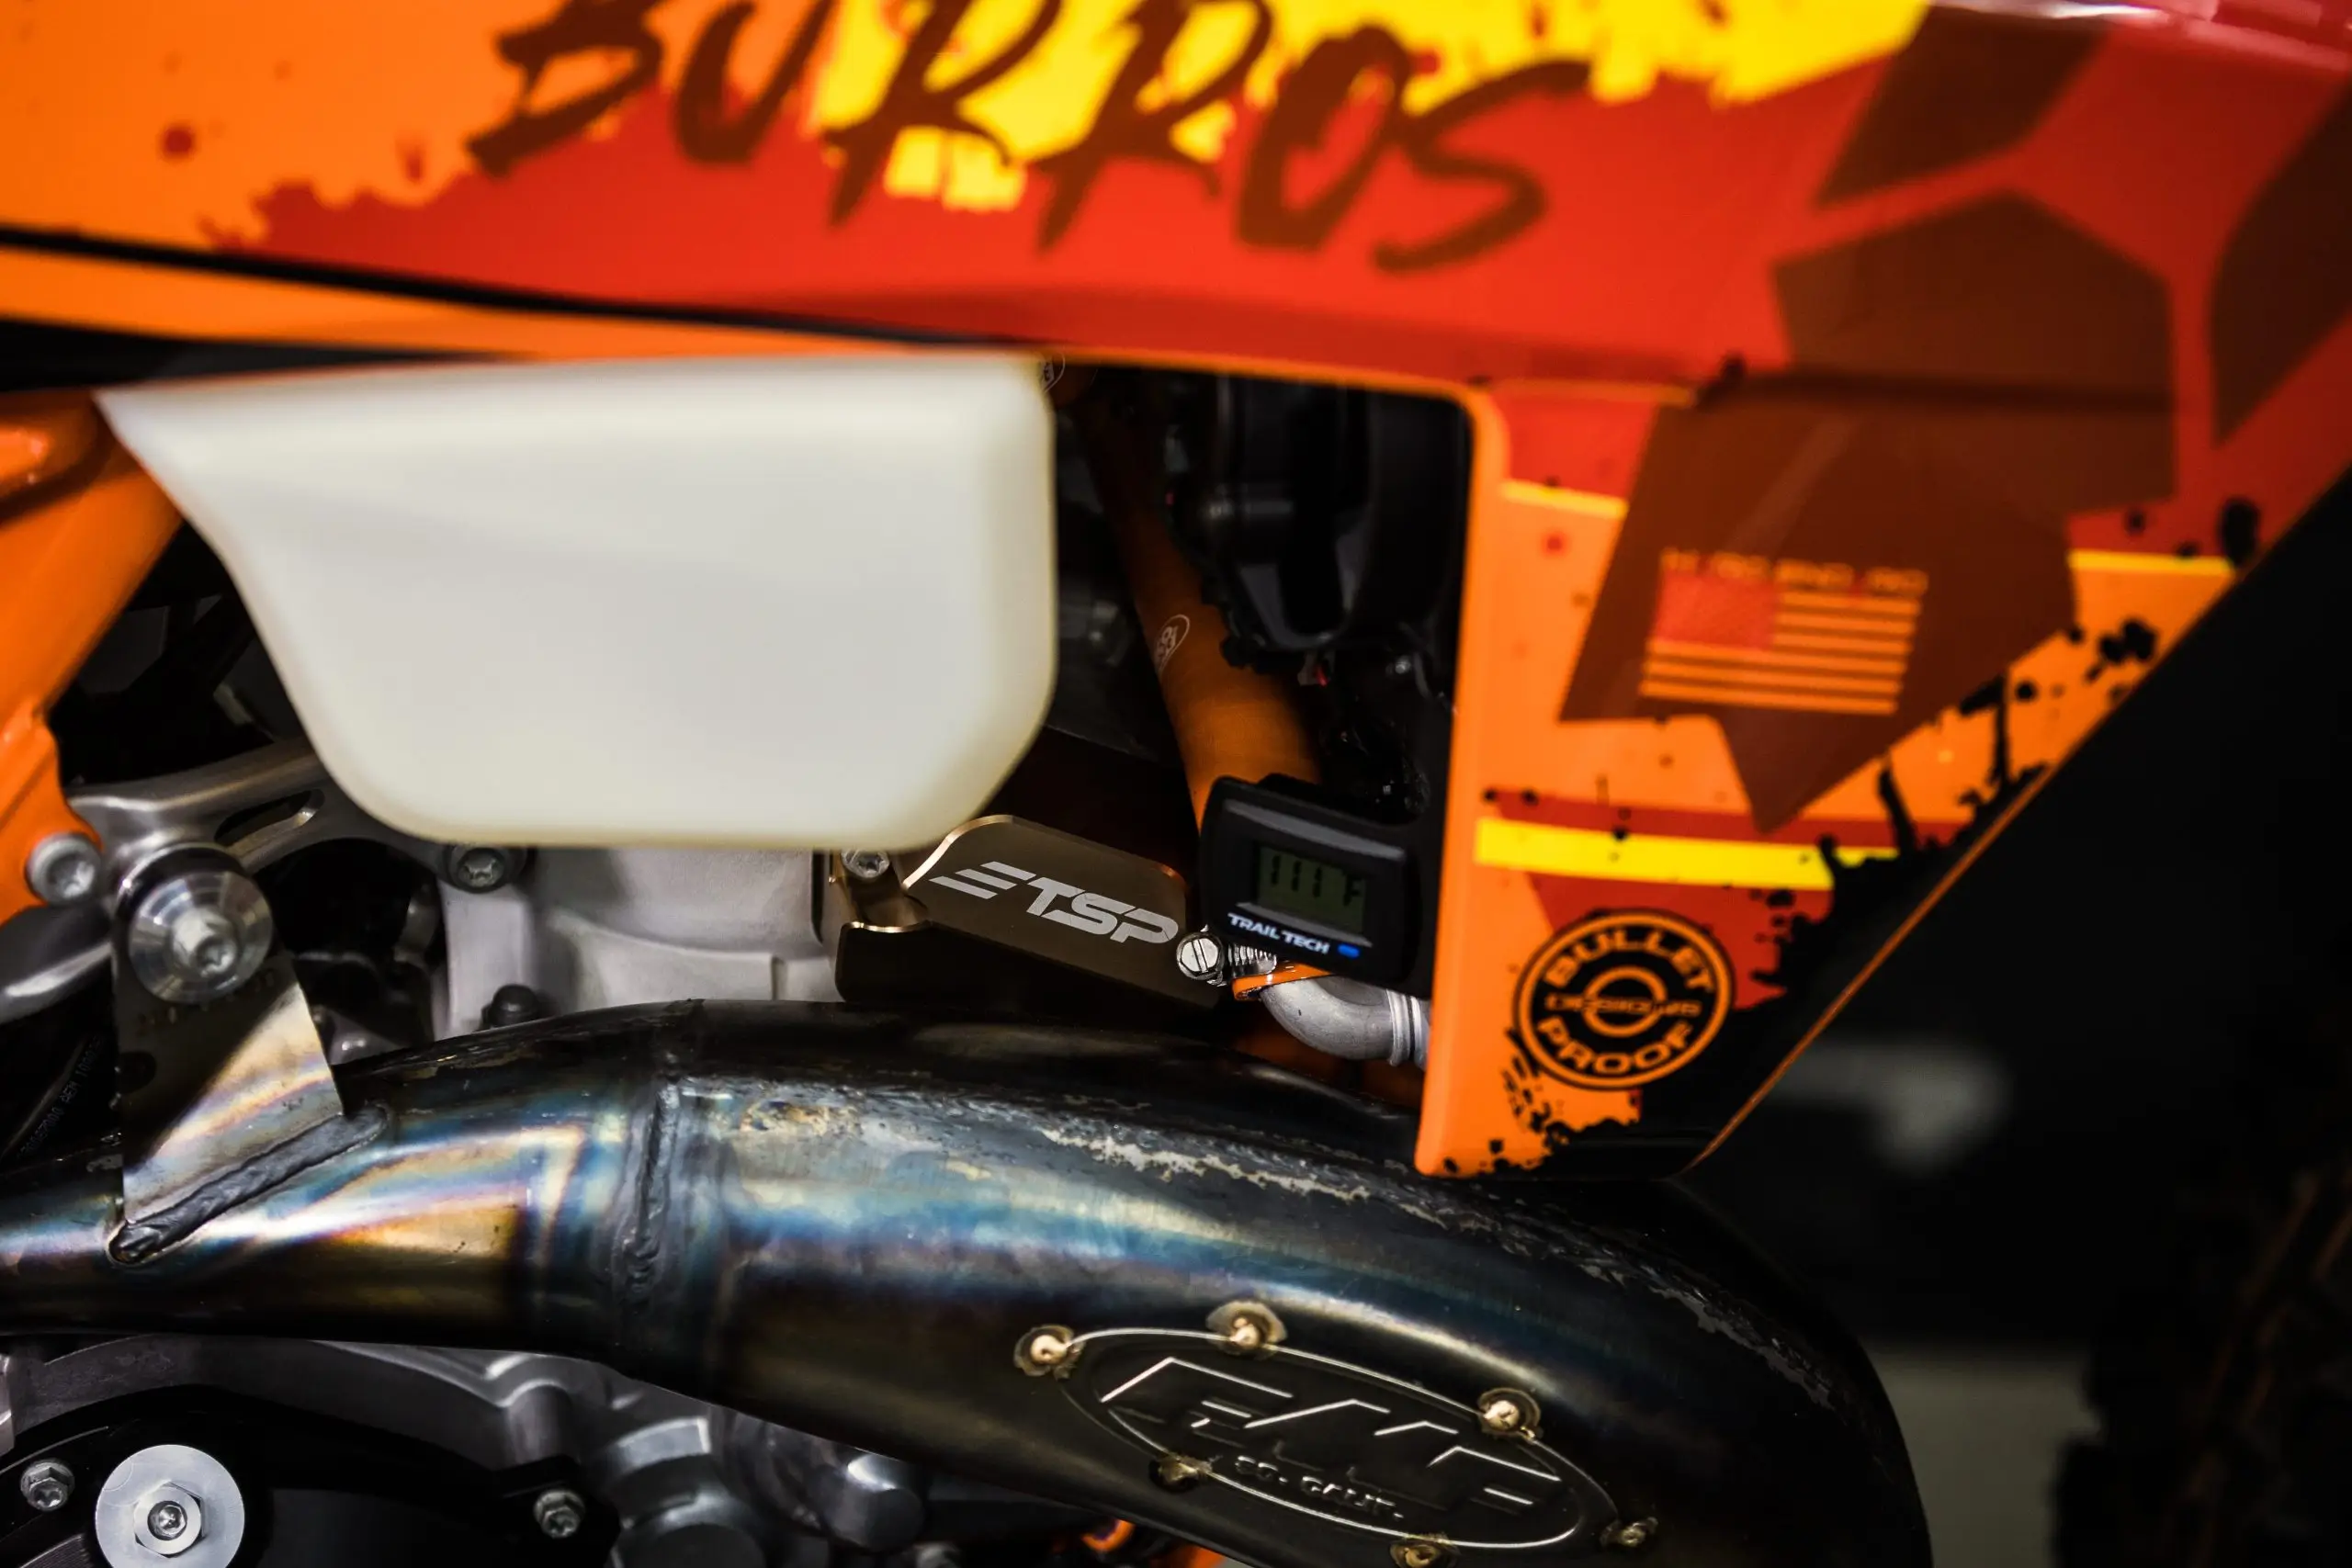
Out of purely trying to leave no stone unturned and build the “Ultimate” hard enduro machine I also opted for a Trail Tech Radiator Fan with a digital temperature display to ensure the engine remains within an optimal temperature range. While some might argue that the stock fan wired into the factor harness is just fine enough, I personally have had the fan fail when connected that way and it hasn’t turned on when it should so on all my bikes, I make sure to have it hard wired to the battery and it has a readout for diagnosing and monitoring. It’s just one of those things where I’ve been there done that and won’t do it any other way.
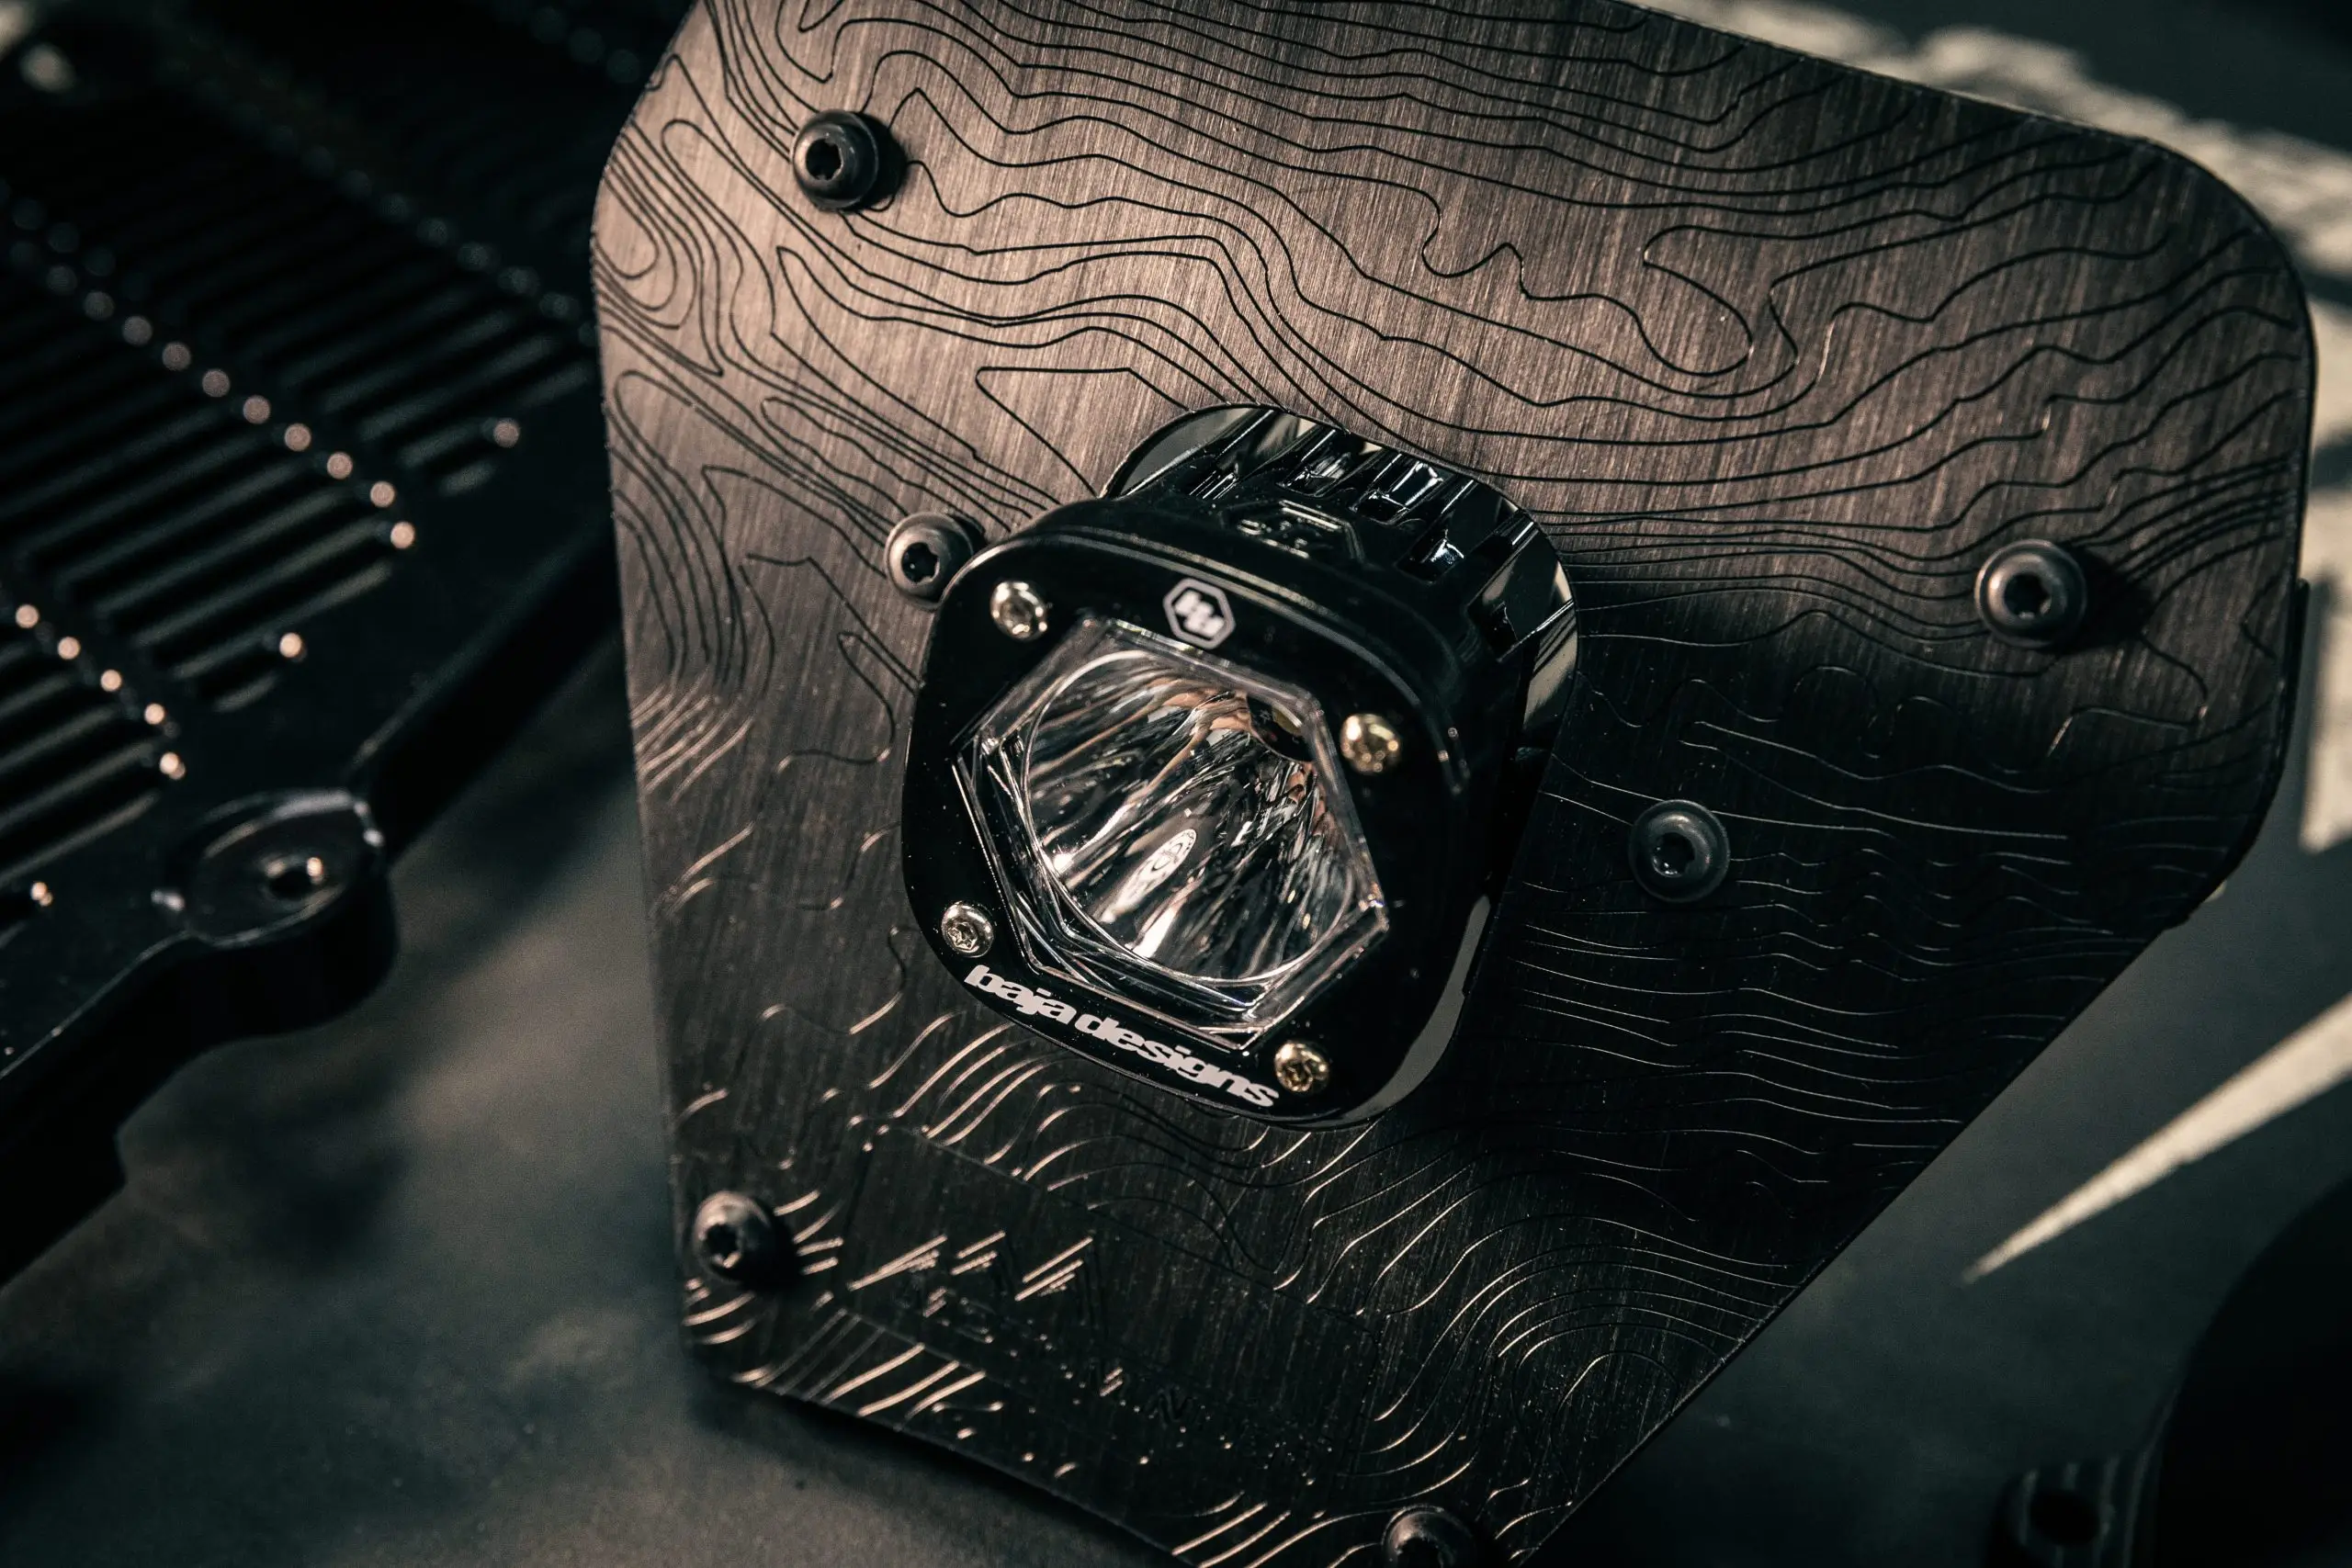
So when it comes to the headlight mask the honest truth is most guys riding exclusively hard enduro will opt for a moto style number plate and completely delete the headlight, but I still do some big multi-day, overnight singletrack rides and navigate zones where it’s nice to have a backup plan when sh&t goes south so it worked out perfect when the guys over at Motominded , provided a S1 headlight and mask. It’s a super lightweight configuration but can also get you out of a tricky situation when you drop down the wrong creek bottom too late into the evening. We’ve all been there! I had to hike out after riding for hours without water and using only my headlight a week before my wedding! No bueno! (Don’t ask my wife about it!)
Pegs: Proper Foot Position is Key
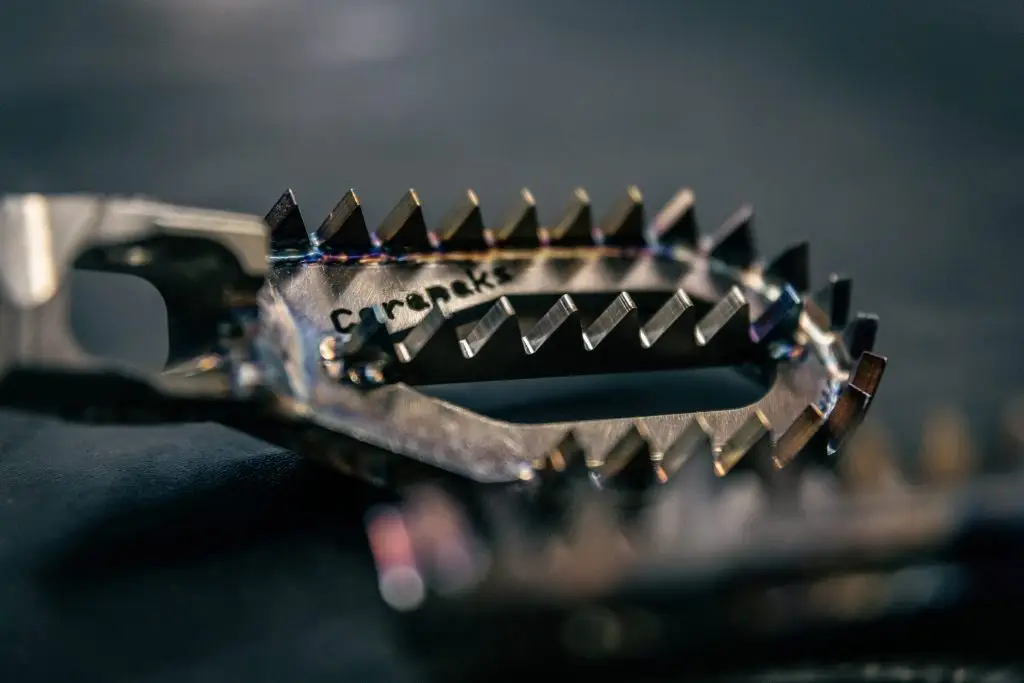
For pegs I went with a set of Carapaks. They are nearly indestructible, stainless steel hard enduro 5mm down and 5mm back drop pegs, hand-welded in Poland, and known for their exceptional strength and durability. I really like having drop pegs because it allows you to lower your center of gravity on the bike and also to drive more weight and traction to the rear wheel by riding on the balls of your feet and dropping the heels. It’s a skill I learned directly from Max Gerston and have really see the value of it over the years.
Final Touches: Graphics & Aesthetics

To complete the build, a custom Burros Edition graphics kit was the icing on the cake. Unlike traditional application methods that use water and soap, MadJack prefers a dry install approach, ensuring perfect alignment and adhesion. Every decal is meticulously placed to provide a bubble free install. We use the guys over at Tec Color Craft to print our graphics. They have the richest color printing and the thickest most durable graphics material out there. If you like the kit and want to rock it on your steed it’s available to buy here.
Finale: A Purpose-Built Machine
This 2025 KTM 300 XCW build really turned out better than I could have imagined. Every component has been carefully selected and installed to maximize durability, performance, and reliability and every bearing and wear item was re-greased properly and torqued to spec. By combining high-quality parts with expert installation techniques, any rider can create a machine capable of withstanding the harshest conditions- and believe me I have been BEATING on this thing!
I’m going to continue to put the bike through its paces in the coming months, testing both the build quality and the performance enhancements. Stay tuned for updates as this Burros Edition takes on hard enduro terrain around the country to film our episodes. Thanks again for tuning in and making it this far along the build process! It’s been a blast to share this information with ya’ll and I’m hopeful it’ll help you setup your next hard enduro bike to take the abuse we throw at them!
00%
Ultimate Burro